

How to Replace Espresso Machine Group Gasket: Step-by-Step
Table of Contents
- Why Your Espresso Machine Group Gasket Matters
- Signs of a Worn Espresso Group Gasket
- How Often to Change Espresso Gasket and Why
- Best Tools for Espresso Machine Repair
- How to Replace Espresso Machine Group Gasket: Step-by-Step
- Troubleshooting Stuck Gaskets
- Understanding Gasket Material Differences
- Preventative Maintenance to Extend Gasket Life
Why Your Espresso Machine Group Gasket Matters
A group gasket is the silicone seal that creates a watertight fit between your portafilter and the group head. Without it, water leaks around the edges during extraction instead of forcing through the coffee grounds, ruining shot consistency and wasting pressure needed for proper flavour development.
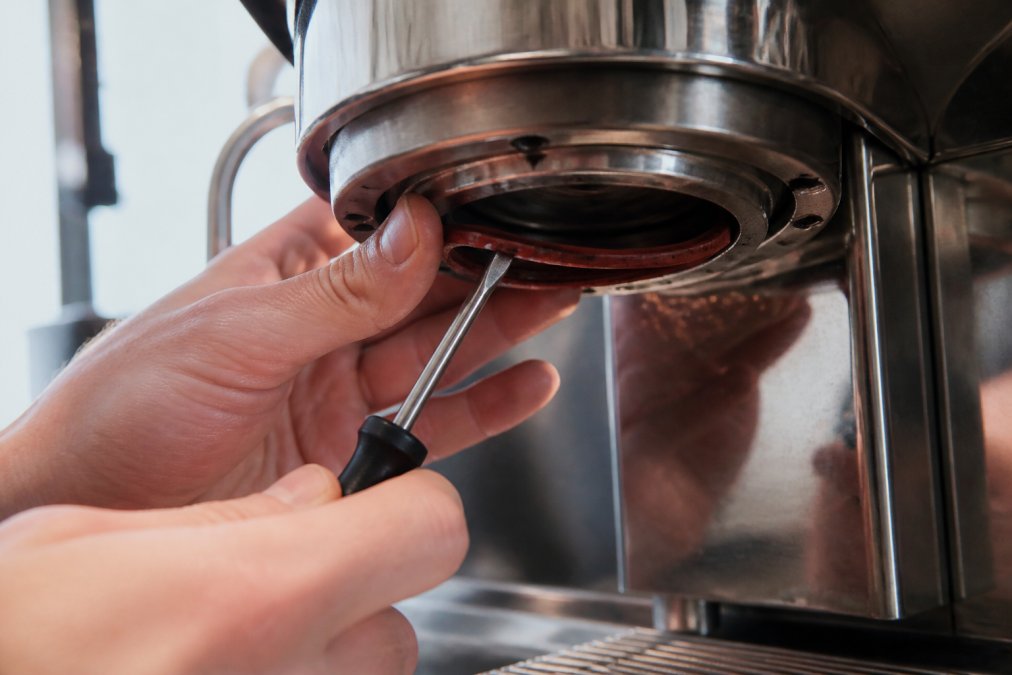
The gasket sits in a groove on the group head's underside. When you lock in the portafilter, the gasket compresses and forms a seal. Over time, heat cycles, pressure, and contact with hot water degrade the silicone until it hardens, shrinks, and fails. At that point, your machine can't maintain the pressure needed for proper espresso extraction.
A worn gasket is often the first culprit when home baristas report inconsistent shots or visible water leaking around the portafilter. Many assume they need a new machine. The real fix is far simpler, and it's a skill every home barista should master.
Replacing your espresso machine group gasket is straightforward if you follow the right process. This guide walks you through each step, from safety precautions through testing for leaks, plus troubleshooting tips for stuck gaskets and advice on gasket material differences.
Signs of a Worn Espresso Group Gasket
Water pooling around the portafilter during extraction is the clearest sign, you'll see it dripping from the sides rather than flowing through the coffee bed. The leak worsens as the machine heats up and pressure builds.
You might also notice weaker or more sour shots, even when your grind and dose haven't changed. This happens because pressure escapes instead of being applied evenly across the puck. Another indicator is resistance when locking in the portafilter; if it suddenly locks in too easily, the gasket has likely compressed or shrunk.
Inspect the gasket visually by removing the portafilter and looking at the rubber seal in the group head. If it appears cracked, flattened, or discoloured (often darkening to brown or black), replacement is due. A healthy gasket should look smooth, uniformly coloured, and slightly rounded at the edges.
How Often to Change Espresso Gasket and Why
Most home baristas should replace their group gasket every 12 to 18 months with regular daily use (peer-reviewed research). Commercial machines in busy cafés might need replacement every 3 to 6 months. If you use your machine only a few times a week, you might stretch it to 2 years.
Water hardness matters significantly; mineral-rich water accelerates gasket degradation. Installing a water filter or descaling regularly can extend gasket life. Temperature cycling also matters, machines left on constantly experience fewer thermal cycles than those switched on and off daily, so they're gentler on gaskets.
The best approach is to inspect your gasket every 6 months. If it still looks smooth and seats firmly, you're fine. If you spot any wear signs, replace it immediately rather than waiting for full failure. A gasket costs very little and takes 15 minutes to swap.
Best Tools for Espresso Machine Repair
You don't need many tools to replace an espresso machine group gasket. A gasket pick is the most specialised tool, this small, flat tool slides under the edge of the old gasket and lifts it out without scratching the group head. You can use a flat-head screwdriver or plastic coffee scoop in a pinch.
A small flathead screwdriver removes the diffuser screw that holds the shower screen in place. Needle-nose pliers help if the screw is stuck or corroded. A clean cloth or soft brush removes old coffee oils and mineral deposits from the group head. A soft brass brush is ideal for the shower screen's underside, where scale builds up.
For cleaning components between steps, have hot water and a small bowl ready. Keep your machine's manual nearby, as different manufacturers position components differently.
How to Replace Espresso Machine Group Gasket: Step-by-Step
Replacing your espresso machine group gasket takes about 15 to 20 minutes once you've gathered your tools.
Step 1: Disconnect Power and Cool the Machine
Switch off your machine and wait for it to cool completely. Even machines that feel cool to the touch retain heat in the group head. Unplug the machine from the wall outlet if possible. Allow at least 20 to 30 minutes for the machine to cool. You'll know it's ready when the group head no longer radiates heat and you can hold your hand near it comfortably.
Step 2: Remove the Portafilter
Once the machine is cool, unscrew the portafilter by turning it counterclockwise. Set it aside on a clean cloth. You won't be reinstalling it until after you've tested the new gasket.
Step 3: Remove the Shower Screen and Diffuser Screw
The shower screen sits just inside the group head opening, held in place by a single screw. Locate this screw and carefully unscrew it using the appropriate screwdriver. Turn slowly and steadily; if it resists, apply gentle pressure without forcing it.
Once the screw is free, carefully lift out the shower screen. Beneath it, you'll see the diffuser, a flat, perforated disc that distributes water evenly across the coffee bed. The diffuser usually sits loosely and will come out when you remove the shower screen.
Step 4: Extract the Old Gasket
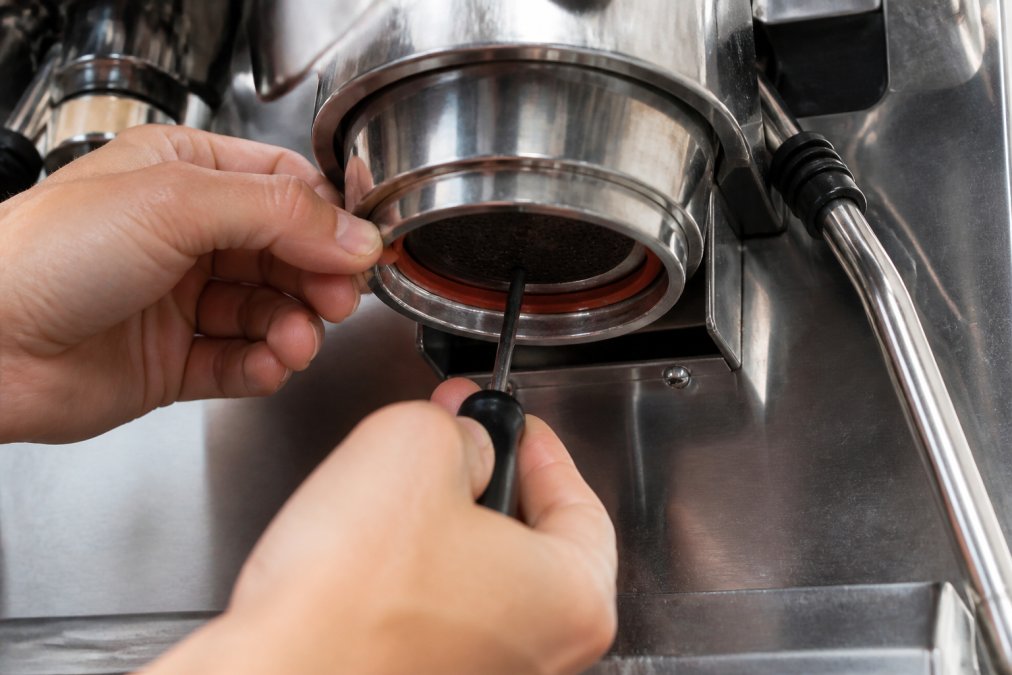
The gasket sits in a groove that runs around the inside of the group head, just below where the portafilter locks in. Use your gasket pick or flathead screwdriver to slide under the beveled edge and apply gentle, steady pressure to lift the gasket slightly. Work your way around the groove, lifting a bit at a time rather than trying to yank it out in one go.
If the gasket is stuck, soak the group head with hot water for a minute to soften the silicone, then try again. Once the gasket is out, inspect the groove for any old rubber residue or mineral buildup.
Step 5: Clean the Group Head and Components
Clean the groove thoroughly using a soft cloth or soft brush to wipe away any old rubber fragments, coffee oils, or mineral deposits. Pay special attention to the beveled edge where the gasket sits; any debris here will prevent the new gasket from seating properly.
If deposits are stubborn, soak the group head with hot water for a few minutes, then brush gently. Avoid abrasive scrubbers, which can scratch the aluminium or stainless steel. While you're at it, clean the portafilter's group seal area. Rinse all components with clean, cool water and dry them thoroughly with a soft cloth.
Step 6: Install the New Gasket
Check the new gasket's orientation before installation. Most gaskets are symmetrical, but some have a beveled edge on one side. The beveled edge should face downward into the groove, creating a wedge shape that helps lock the gasket in place.
Gently press the new gasket into the groove, starting at one point and working your way around. The gasket should seat smoothly with light finger pressure. Once fully seated, run your finger around the entire groove to confirm it's even and flush.
Now reinstall the diffuser and shower screen. Place the diffuser back into the group head, then align the shower screen on top. Insert the diffuser screw and tighten it firmly but not aggressively.
Step 7: Test for Leaks
Reinstall the portafilter with your regular basket and coffee. Lock it in firmly; you should feel solid resistance as the new gasket compresses. Run water through the group head without any coffee in the basket. Watch carefully for leaks around the portafilter. There should be no steady dripping or streaming water.
Once you're confident the seal is tight, pull a test shot with your regular coffee dose. Water should flow through the coffee bed, not around the sides. Check the group head and portafilter after the shot; there should be no water pooling around the seal.
Troubleshooting Stuck Gaskets
A gasket that won't come out is frustrating but fixable. Run hot water through the group head for 30 seconds to warm the gasket and soften the silicone slightly. Then try lifting it with your gasket pick, applying slow, steady pressure rather than sudden force. Work your way around the groove, lifting a bit at a time.
If the gasket still resists, soak the entire group head by filling a small container with hot water and submerging it for a few minutes (if your machine allows safe removal). Some baristas apply a tiny amount of food-grade silicone lubricant around the gasket's edge to reduce friction, but use sparingly.
If the gasket breaks during removal, carefully remove the remaining pieces with your pick, working methodically around the groove. Inspect the groove carefully under good lighting. If you spot any rough edges or damage, use a soft cloth or very fine sandpaper to smooth the area gently.
Understanding Gasket Material Differences
Most home espresso machines use silicone gaskets because silicone is affordable, durable, and resistant to thermal cycling. Standard silicone gaskets typically last 12 to 18 months with regular daily use (peer-reviewed research).
Some premium machines use EPDM (ethylene propylene diene monomer) gaskets, which are slightly more heat-resistant and can last a bit longer than silicone, sometimes reaching 2 years (peer-reviewed research). A few high-end machines use Viton (fluorocarbon) gaskets, which offer superior heat and chemical resistance and are the most durable option but also the most expensive.
When you order a replacement gasket, confirm your machine's specifications. Using the wrong material can result in a poor seal or premature failure. Your machine's manual should specify the correct gasket type and size. Standard home espresso machine gaskets are usually 8mm or 9mm in diameter, but commercial machines vary. Always match your replacement to your machine's original gasket dimensions.
Preventative Maintenance to Extend Gasket Life
Use filtered water in your machine. Mineral deposits from hard water accelerate gasket degradation by creating friction and buildup in the groove. A simple water filter on your machine's inlet makes a significant difference.
Descale your machine regularly according to the manufacturer's recommendations, usually every 2 to 4 weeks depending on water hardness. Backflush your group head weekly if your machine has a 3-way solenoid valve. This keeps the gasket groove clean and reduces buildup that could interfere with the seal. Never backflush with a basket in the group head.
Soak your shower screen and diffuser in espresso machine cleaner once a month. Allow your machine to cool completely before using it after long periods of idle time. Finally, inspect your gasket every 6 months even if it seems fine. Catching early signs of wear lets you replace the gasket on your schedule rather than dealing with an unexpected failure.
Replacing your espresso machine group gasket is one of the most valuable skills a home barista can develop. It takes just 15 minutes, costs very little, and instantly restores your machine's ability to maintain pressure and deliver consistent, flavourful shots. If your shots have been tasting weak or your machine has been leaking, a fresh gasket might be exactly what you need. Explore our selection of premium espresso machines and maintenance accessories designed to help you maintain café-quality performance at home.
Frequently Asked Questions
How often should I replace a group head gasket?
Most home baristas should replace their espresso machine group gasket every 12-18 months with regular use (5-10 espressos daily). Commercial machines may need replacement every 6-8 months due to higher extraction volumes. Frequency depends on water quality, backflushing habits, and how often you clean components. If you notice leaking around the portafilter or inconsistent extraction pressure, replace it sooner regardless of age.
What tools do I need to change an espresso machine seal?
You'll need a gasket pick or small flathead screwdriver to remove the old seal, a 6mm socket or hex key to remove the diffuser screw, and a small brush or cloth for cleaning. A container for soaking components in degreaser (like Cafiza) is helpful but optional. Most replacements don't require specialist tools, basic household items work well. Ensure your gasket pick is plastic or soft-tipped to avoid scoring the group head.
Why is my coffee machine leaking from the group head?
Leaking from the group head usually signals a worn or degraded silicone gasket that no longer creates a tight seal. Over time, heat, pressure, and coffee oils break down the rubber seal, allowing water to escape around the portafilter. Other causes include a misaligned portafilter, debris trapped under the gasket, or a damaged group head surface. Replacing the gasket typically resolves the issue. If leaking persists after replacement, inspect the group head for cracks or scoring.
Can I replace my espresso machine gasket myself?
Yes, replacing your group gasket is straightforward for most home baristas and requires no specialist skills or training. The process takes 20-30 minutes and involves removing the portafilter, shower screen, and old gasket, then installing a new one. As long as you disconnect power, allow the machine to cool, and follow the steps carefully, you can complete this maintenance task safely at home. If your machine has a unique design, consult your manual for specific guidance.
This article was written using GrandRanker