

Essential Espresso Puck Preparation Tools: 2026 Guide
Table of Contents
- Why Puck Preparation Tools Decide Shot Quality
- The Complete Espresso Puck Preparation Workflow
- Choosing a WDT Tool for Espresso: Needle Thickness and Technique
- Espresso Dosing Funnel: Reducing Mess and Improving Distribution
- Espresso Tamper Options: Manual, Lever and Electronic
- Puck Screens, Bottomless Portafilters and Basket Fit
- How to Prevent Espresso Channeling: Troubleshooting by Symptom
- Building a Starter Kit by Budget
- Frequently Asked Questions
Last Updated: October 17, 2026
Why Puck Preparation Tools Decide Shot Quality
Essential espresso puck preparation tools are the small, unglamorous items that sit between your grinder and your machine, and they decide whether a good grind turns into a good shot.
The core problem is that ground coffee lands in the basket unevenly. Fines cluster, air pockets form, and water takes the path of least resistance. That is channeling, and it shows up as a fast, pale, bitter shot no matter how carefully you dialled in the grind.
The Complete Espresso Puck Preparation Workflow
Puck preparation follows a fixed sequence: dose, distribute, level, tamp. Each stage fixes the mistake of the previous one, and skipping a stage cannot be rescued later. The whole routine takes under a minute once it becomes habit, but each step has a specific failure mode worth knowing before you buy a single tool.
Step 1: Dose and Grind (roughly 10 seconds)
Weigh the dose into the basket rather than relying on a timer alone. A grinder with fine adjustment makes this repeatable, and the Baratza Encore ESP at £159.95 includes an anti-static dosing cup that fits 54mm baskets, or 58mm with the adapter.

Failure mode: dosing by time alone. Grind retention and bean age shift the output weight by a gram or more between shots, which is enough to change the puck's resistance.
Step 2: Distribute and Level (roughly 20 seconds)
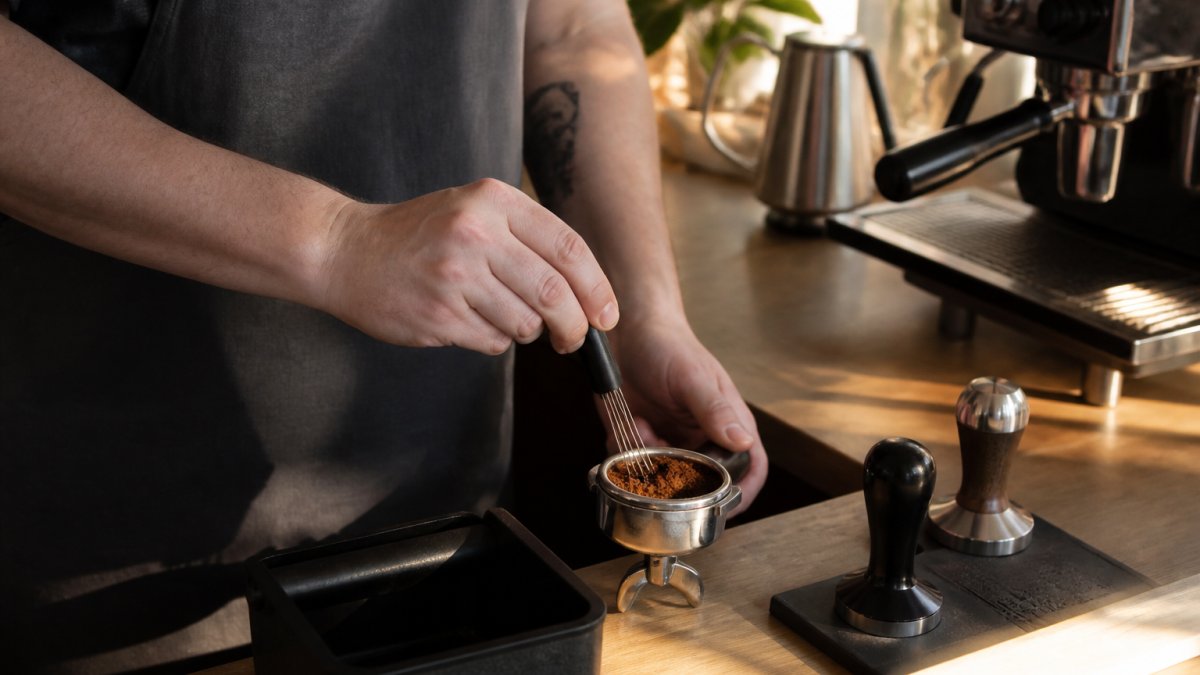
Break up clumps with a needle tool, then level the bed so the surface is flat. A dosing funnel keeps grounds inside the basket during both steps. This is where most inconsistency is introduced and most inconsistency is solved. Work the needles from the bottom of the basket upward in small circles, then use a levelling tool or a light tap to flatten the surface before tamping.
Failure mode: stirring only the top layer. Clumps near the base of the basket survive a shallow stir and reappear as localised channelling.
Step 3: Tamp (roughly 5 seconds)
Press straight down with even pressure. The goal is a level, fully compressed puck, not brute force. A tamper that sits flush with your basket diameter does more for consistency than any amount of extra pressure. Once the puck is compressed, stop, a second press adds nothing and risks tilting the bed.
Failure mode: tamping at an angle. The tamper edge digs in on one side and leaves a wedge of looser coffee opposite it.
Step 4: Flush and Lock In (roughly 5 seconds)
Run a short flush through the group head before locking in, both to clear old grounds from the shower screen and to bring the head to temperature. Lock the portafilter in squarely and start the shot immediately, a prepared puck left sitting while you fetch a cup dries at the surface and can crack.
The order matters more than the tools
The sequence is deliberately fixed: distribution before levelling, levelling before tamping. A levelling tool used on an un-stirred bed simply flattens the clumps into an even-looking layer that still channels underneath. Likewise, a perfect tamp cannot rescue a bed that was never distributed. If you change one thing in your routine, add the needle stir before the level, it is the step that most home setups skip and the one that removes the most variation.
Choosing a WDT Tool for Espresso: Needle Thickness and Technique
A WDT tool for espresso is a handle holding fine needles that you stir through the dose to break up clumps and redistribute fines. The Weiss Distribution Technique works because it physically mixes the coffee bed before water touches it, and needle thickness matters more than most buyers expect.
Technique matters as much as the tool. Stir in small circles from the bottom of the basket upward, keep the needles vertical, and stop when the surface looks even. Do not stir aggressively enough to spill grounds over the rim, and do not skip levelling afterwards.
Espresso Dosing Funnel: Reducing Mess and Improving Distribution
An espresso dosing funnel clips onto the basket and keeps grounds contained while you grind, stir and level. The benefit is not just a cleaner counter. A funnel lets you work the coffee bed properly instead of rushing to avoid spillage, which means better distribution and less waste. Magnetic funnels stay put during stirring; friction-fit models are cheaper but can shift.
Mazzer Easy Tamper with Base – Professional Espresso Tamping System →
Espresso Tamper Options: Manual, Lever and Electronic
An espresso tamper comes in three broad forms, and the right one depends on how many people share the machine. A lever system such as the Mazzer Easy Tamper with Base, at £627.60, applies a constant pressing force with a 30° rotating action that mimics natural wrist movement.

For high-volume settings, the Mazzer T-Tamper Electronic at £1,325.00 automates distribution, levelling and tamping, fits virtually all 58mm commercial portafilters including bottomless ones, and offers adjustable force from 10kg to 35kg across Fast and Precise profiles. It removes barista-to-barista variation and reduces repetitive strain.
| Tamper type | Consistency | Best for | Example |
|---|---|---|---|
| Manual | Depends on technique | Single home user | Standard hand tamper |
| Lever with base | Constant force, repeatable | Cafés with shared stations | Mazzer Easy Tamper, £627.60 |
| Electronic | Fully automated, adjustable | High-volume service | Mazzer T-Tamper, £1,325.00 |
Puck Screens, Bottomless Portafilters and Basket Fit
A puck screen sits on top of the coffee bed and spreads water more evenly across the surface while keeping the shower screen cleaner. A bottomless portafilter removes the spouts so you can watch the extraction and spot channeling as it happens, which makes it the single best diagnostic tool in this list. Basket fit ties both together: your tamper diameter, funnel and screen must match the basket, and 58mm is the common commercial standard while many home machines use 54mm.
How to Prevent Espresso Channeling: Troubleshooting by Symptom
To prevent espresso channeling, match the fix to the symptom rather than changing everything at once. Channeling is water punching a narrow path through the puck instead of flowing evenly through the whole bed, and each symptom points to a specific stage of preparation.
| Symptom | Likely cause | Fix | Tool |
|---|---|---|---|
| Fast, pale, sour shot | Cracks or gaps in the puck | Improve distribution and level before tamping | WDT tool, levelling tool |
| Spritzing from a bottomless basket | Localised channel | Stir more thoroughly, tamp level | Needle tool, flat tamper |
| Bitter and uneven flavour | Fines migrated to one area | De-clump before levelling | WDT tool |
| Wet, sloppy puck | Under-dosed basket | Weigh the dose, use the correct basket size | Scale, dosing cup |
| Mess on the counter | No containment during grinding | Add a funnel | Dosing funnel |
Change one variable at a time and taste the result. Changing grind, dose and technique together tells you nothing.
Building a Starter Kit by Budget
Most tool roundups list everything you could buy. This section does the opposite: it separates the tools that fix the most common shot faults from the upgrades that only make sense once your routine is repeatable, and it groups them into three practical tiers. The unique angle here is priority, buy in this order and you will solve more problems per pound spent than by buying the most expensive item first.
The essentials (buy these first)
Three tools cover the faults that account for most bad shots: a needle tool for clump-breaking, a dosing funnel for containment, and a tamper that fits your basket exactly. Without these, every other purchase is built on an unstable base. A bottomless portafilter is the best value diagnostic upgrade you can make, because it lets you see channelling as it happens rather than guessing from taste.
Tier 1: Low budget, the minimum viable kit
- A needle distribution tool (WDT), the single highest-impact purchase.
- A dosing funnel that fits your basket diameter.
- A flat tamper matched to your basket (58mm commercial, 54mm on many home machines).
- A set of scales accurate to 0.1g.
At this tier, spend on fit rather than features. A cheap tamper that matches your basket beats an expensive one that leaves an untamped ring around the edge.
Tier 2: Mid budget, add diagnostics and consistency
- A bottomless portafilter to watch extraction and spot channelling.
- A levelling/distribution tool to flatten the bed after stirring.
- A puck screen to spread water more evenly and keep the shower screen cleaner.
- A better grinder, because grind quality sets the ceiling on everything else. The Baratza Encore ESP Pro at £249.95 adds stepless adjustment, a 0.1-second precision timer and ion-generation technology to reduce grind retention and static, which matters when you are single dosing. The Sage Smart Grinder Pro at £209.95 offers 60 settings and Dosing IQ with 0.2-second increments.
Tier 3: High budget, remove human variation
- A lever tamper with a base for constant, repeatable force, such as the Mazzer Easy Tamper with Base at £627.60, which applies a constant pressing force with a 30° rotating action (Mazzer specifies a long portafilter fork is needed for compatibility).
- An electronic tamper for high-volume stations, such as the Mazzer T-Tamper Electronic at £1,325.00, which automates distribution, levelling and tamping, fits virtually all 58mm commercial portafilters including bottomless ones, and offers adjustable force from 10kg to 35kg across Fast and Precise profiles.
- A knock box to finish the station: the Sage the Knock Box 10 at £29.95 holds ten pucks and has a removable knock bar for cleaning.
What to skip until later
Puck screens, precision baskets and electronic tampers are worthwhile, but none of them compensate for poor distribution. A common pattern is a barista who buys an electronic tamper before a needle tool and still gets channelling, because the fault was never in the tamp. Fix distribution and levelling first; the automation upgrades pay off only once the basics are consistent.

Frequently Asked Questions
What tools do you need to prepare an espresso puck?
A basic kit includes a dosing funnel to keep grounds contained, a WDT tool to break up clumps, and a tamper matched to your basket diameter. A distribution tool and puck screen are useful additions. A knock box keeps the workflow tidy. The Baratza Encore ESP grinder, at £159.95, includes a dosing cup that fits 54mm baskets or 58mm baskets with the adapter, simplifying the first stage of puck preparation.
Does a WDT tool improve espresso extraction?
A WDT tool for espresso stirs the grounds with fine needles to break up clumps and even out density before tamping. This reduces the chance of water finding a path of least resistance, which is the main cause of channeling. Even distribution supports a more uniform coffee bed, and a level bed gives water a consistent path through the puck. The result is a more even extraction and better shot consistency.
How can I reduce channeling in espresso?
Channeling happens when water pushes through weak spots in the puck instead of flowing evenly. To prevent espresso channeling, grind consistently, use a WDT tool to de-clump, level the coffee bed, and tamp straight. Check that your basket is not overfilled and that the tamper matches the basket diameter. A bottomless portafilter makes channeling visible, so you can spot uneven flow and correct your technique.
How should you clean espresso puck preparation tools?
Rinse WDT needles and distribution tools in warm water after each session to remove coffee oils, and dry them fully to prevent rust. Wipe the tamper base with a damp cloth. Brush out the dosing funnel and puck screen to keep grounds from building up. For the Mazzer Easy Tamper with Base, wipe the aluminium pressing disc and keep the freestanding base clear of grounds. Regular cleaning keeps tools working predictably.