

Improving Espresso Extraction With Proper Tamping
Last Updated: October 23, 2026
Quick Summary
Improving espresso extraction with proper tamping means pressing a level, evenly distributed coffee bed straight down until the puck stops compressing, then lifting cleanly. The pressure itself matters less than repeating the same full compression every time, so water flows evenly and channeling drops.
- Distribute grounds with a WDT tool before tamping to break up clumps.
- Press straight down until the puck stops compressing, hold one second, lift cleanly.
- Match the tamper base to the basket's internal diameter to avoid edge gaps.
- Keep the dose consistent so headspace stays constant and channelling is reduced.
- Fix puck preparation before adjusting grind, because a bad tamp mimics grind problems.
Table of Contents
- Why Tamping Decides Whether Your Espresso Extraction Works
- How to Tamp Espresso: A Repeatable Step-by-Step Routine
- Espresso Distribution Technique: Level the Coffee Bed Before You Press
- Espresso Tamping Pressure: How Much Force Actually Matters
- Espresso Channeling Causes: Read the Puck, Not Just the Shot
- Basket Geometry, Tamper Fit and Dose Headspace
- Troubleshooting Shot Symptoms: A Controlled Diagnostic Guide
- Frequently Asked Questions
Why Tamping Decides Whether Your Espresso Extraction Works
Tamping is the step that turns loose coffee grounds into a compacted puck, and it decides whether water flows evenly through your basket. Get it level and consistent, and improving espresso extraction with proper tamping becomes far easier to repeat. We see the same pattern in most home setups: the grind is dialled in, the machine is warm, and the shot still runs uneven.
The reason is usually the puck, not the equipment.
A flat, evenly compacted coffee bed gives water one predictable path. A tilted or patchy bed gives it several, and water always takes the easiest route. That is why tamping matters more than most guides admit.
- Level surface: water meets equal resistance across the basket
- Even density: no soft spots for water to rush through
- Repeatability: the same routine produces the same shot
Skip any of these and you get channeling, sour patches and gushing shots. Below, we break down the full routine, from distribution to diagnosis.
How to Tamp Espresso: A Repeatable Step-by-Step Routine
Learning how to tamp espresso is mostly about building a routine you can repeat without thinking. The pressure matters less than doing the same thing every single time.
Here is the sequence we recommend:
- Dose into a dry basket, straight from the grinder
- Distribute with a WDT tool to break up clumps
- Level the coffee bed so the surface sits flat
- Rest the tamper flat on the basket rim, then lower it
- Press straight down until the puck stops compressing
- Lift cleanly, without twisting or tapping the portafilter
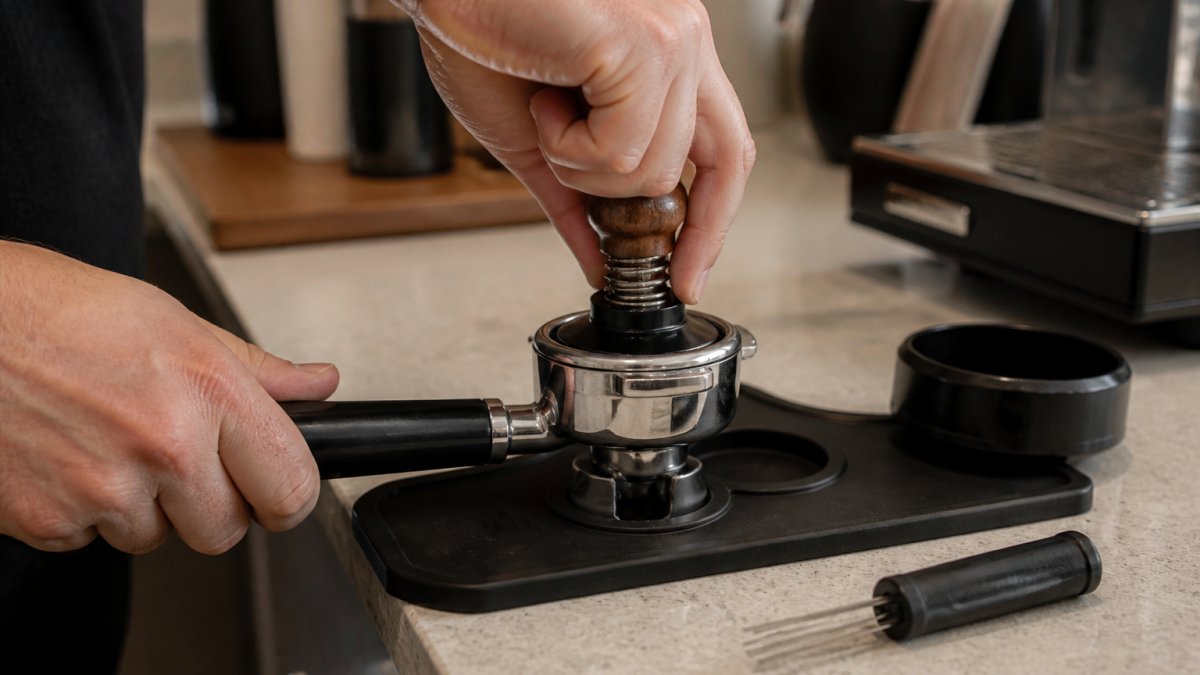
The straight downward motion is the whole skill. Any sideways force tilts the puck. A portafilter and tamper station keeps the basket steady while you press, which removes one more variable from the routine.
Expected result: a flat, firm surface with no cracks and an even ring of coffee against the basket wall.
Espresso Distribution Technique: Level the Coffee Bed Before You Press
Espresso distribution technique is the work you do before the tamper touches the coffee. It is the step most home baristas rush, and it is the one that decides whether your tamp can even work.
Freshly ground coffee clumps. Press a clump and you seal a dense pocket that water will avoid. Stir the bed with a WDT tool first and those clumps break apart, so the grounds settle at a more even density.
- Stir in slow circles through the full depth of the basket
- Keep the tool vertical, not angled
- Finish with a light tap to settle the surface
- Never press down with the distribution tool
A wooden portafilter holder and tamper station holds the basket level while you distribute, so gravity does half the work. Level the bed first, and the tamp only has to compact it.
Espresso Tamping Pressure: How Much Force Actually Matters
Espresso tamping pressure is the most overthought number in coffee. The honest answer: once the puck is fully compressed, extra force changes almost nothing about extraction. What matters is that the same full compression happens every time, evenly across the basket.
What the puck actually does under pressure
Ground coffee is a porous bed of particles. When you press, the particles rearrange and lock together until the bed reaches a point where it resists further compression. Push beyond that point and you are pressing against a solid mass, not changing its density in any useful way. The practical implication is simple: a firm press that fully compacts the bed is enough, and repeating that same firm press is what produces repeatable shots.
This is why claims that ever-higher force directly improves extraction do not hold up. The puck has already stopped compressing; adding body weight only risks tilting the tamper and straining your wrist. Treat pressure as a binary, fully compressed or not, rather than a dial to maximise.
A measurable practice protocol
You can train a consistent, level tamp without guessing. Hold dose, grind and yield constant, then change only your tamping and compare shots:
- Fix the variables. Use the same dose to 0.1 g, the same grind setting, and stop every shot at the same yield by weight. Record the shot time.
- Tamp to a target. Press until you feel the puck stop compressing, hold for one second, then lift cleanly. Do not add extra force.
- Check levelness. After tamping, sight across the puck from two directions. A level puck shows an even ring of coffee against the basket wall and no visible tilt.
- Pull and compare. Note shot time and taste. If the puck is level and fully compressed, shot-to-shot variation should shrink even though you changed nothing else.
- Repeat across five shots. Consistency is proven by a tight spread in shot times, not by a single good shot.
If shot times still swing widely with a level, fully compressed puck, the cause is almost certainly grind, dose or distribution, not tamp pressure. That is the discipline that separates improving espresso extraction with proper tamping from chasing force.
Mazzer T-Tamper Coffee Tamper - Electronic, 100W →
Espresso Channeling Causes: Read the Puck, Not Just the Shot
Espresso channeling causes are almost always in the puck preparation, not the tamp alone. Channeling is water forcing a narrow path through a weak spot instead of flowing evenly through the coffee bed.

Look at the spent puck after the shot. Holes, cracks or a soggy patch tell you where water escaped. A puck that falls out in one clean disc usually behaved.
The usual culprits:
- Clumps left in the bed from skipped distribution
- A tilted tamp that left one side looser
- Grind size too coarse for the basket
- Dose too low, leaving headspace water can pool in
A grinder that produces consistent grounds is the first defence. Repeatable grind settings reduce the variation that leads to puck defects.
Fix distribution and level first. Change the grind only after the puck looks clean.
Basket Geometry, Tamper Fit and Dose Headspace
Basket geometry decides how well your tamper can work, and it is the part of puck preparation most guides skip. A tamper that is too small leaves an unpressured ring of coffee around the edge, and water will find it. Match the tamper base to the basket's internal diameter so the base fits with minimal play and compresses the full surface evenly.
Why edge gaps matter
Most baskets taper slightly towards the base. If your tamper is undersized, the puck is dense in the centre and loose at the rim. Water takes the path of least resistance, so it escapes through that loose ring, the classic sign is a shot that runs fast and blondes early while the centre of the puck looks fine. A base that sits flush with the basket wall removes that escape route. Common nominal sizes are 51 mm, 54 mm and 58 mm, but measure your basket's internal diameter rather than assuming, because a 58 mm tamper in a 58.5 mm basket still leaves a gap.
Headspace and dose
Headspace is the gap between the top of the puck and the shower screen. Leave too much and water pools above the puck before it penetrates, which can disturb the bed and encourage channelling. Overfill and the puck hits the screen, cracks, and the shot runs unevenly.
- Check the tamper sits flush with the basket wall with minimal play
- Measure the basket's internal diameter before buying a tamper
- Keep the dose consistent so headspace stays constant
- Store tools together so the routine never stalls
A wooden espresso tool station for portafilter, tamper, distributor and brush keeps everything in one place, which makes the whole sequence faster and more repeatable. Get the fit and headspace right and the tamp only has to compact an already level, correctly dosed bed.
Troubleshooting Shot Symptoms: A Controlled Diagnostic Guide
Diagnosing a bad shot starts with one rule: change one variable at a time. Shot symptoms point to likely causes, but only if you test them in isolation.
| Symptom | Likely Cause | First Fix |
|---|---|---|
| Shot gushes fast, tastes sour | Channeling or coarse grind | Check puck for cracks, then grind finer |
| Shot drips, tastes bitter | Grind too fine or dose too high | Coarsen grind slightly |
| Uneven flow from one side | Tilted tamp or uneven bed | Re-level and re-tamp |
| Puck sticks to shower screen | Overdosed basket | Reduce dose |
| Soggy, cratered puck | Underdosed or too much headspace | Increase dose |
Work down the list in order. Fix puck preparation before touching the grind, because a bad tamp mimics grind problems. Only adjust grind size once the puck comes out clean and level.
That discipline is what separates improving espresso extraction with proper tamping from simply guessing at the grinder.
Frequently Asked Questions
How hard should you tamp espresso?
Firm enough to fully compress the bed, then stop. Once the puck is compacted, extra force adds nothing to extraction. The variable that matters is keeping the tamper level and using the same firm pressure every time. A spring-loaded tamper helps by giving a consistent feel, while a flat stainless base distributes force evenly across the basket. Focus on repeatability rather than pushing harder.
Does tamping pressure affect espresso extraction?
It affects it far less than most people assume. Tamping pressure mainly removes air and creates a uniform surface; beyond full compression, more force does not change flow rate. What does affect extraction is an uneven or tilted tamp, which creates paths of lower resistance and causes channeling. Keep pressure firm and consistent, and put your effort into distribution and levelness instead.
How can uneven tamping cause channeling?
A tilted or off-centre tamp compacts one side of the puck more than the other. Water follows the path of least resistance, so it rushes through the looser side, over-extracting that area and under-extracting the rest. The result is a shot that tastes both bitter and sour. Level the bed with a distribution tool first, then press straight down with the tamper base parallel to the basket rim.
Should you tamp espresso more than once?
No. A single firm, level press is enough. Tamping twice, or twisting after the press, can crack the surface of the puck and create fissures that encourage channeling. If you use a rotating tamper system, follow its designed motion once and leave the puck alone. The goal is a flat, evenly compacted bed, not repeated compression.
Consistent espresso comes from controlling variables, and tamping is the one most home baristas leave to chance. At Coffee Craft Studio, we stock the tools that take that guesswork out: precision tampers, distribution tools and stations built for repeatable puck prep. Browse our range of espresso machines and accessories and build a workflow where every shot starts from the same flat, even bed. Choose options that suit your basket, and let the routine do the rest.
