

How to Store Coffee Grinder Parts: A Complete Guide
Table of Contents
- Prepare Your Grinder Parts for Storage
- How to Clean Coffee Grinder Burrs
- Essential Coffee Grinder Cleaning Tools
- How to Prevent Coffee Grinder Burrs from Rusting
- Coffee Grinder Hopper Storage Best Practices
- Ideal Storage Environment for Grinder Components
- Long-Term Storage and Reassembly
- Frequently Asked Questions
Last Updated: October 12, 2026
Prepare Your Grinder Parts for Storage
Storing coffee grinder parts properly keeps them working for years, the key is cleaning, drying and protecting each component.
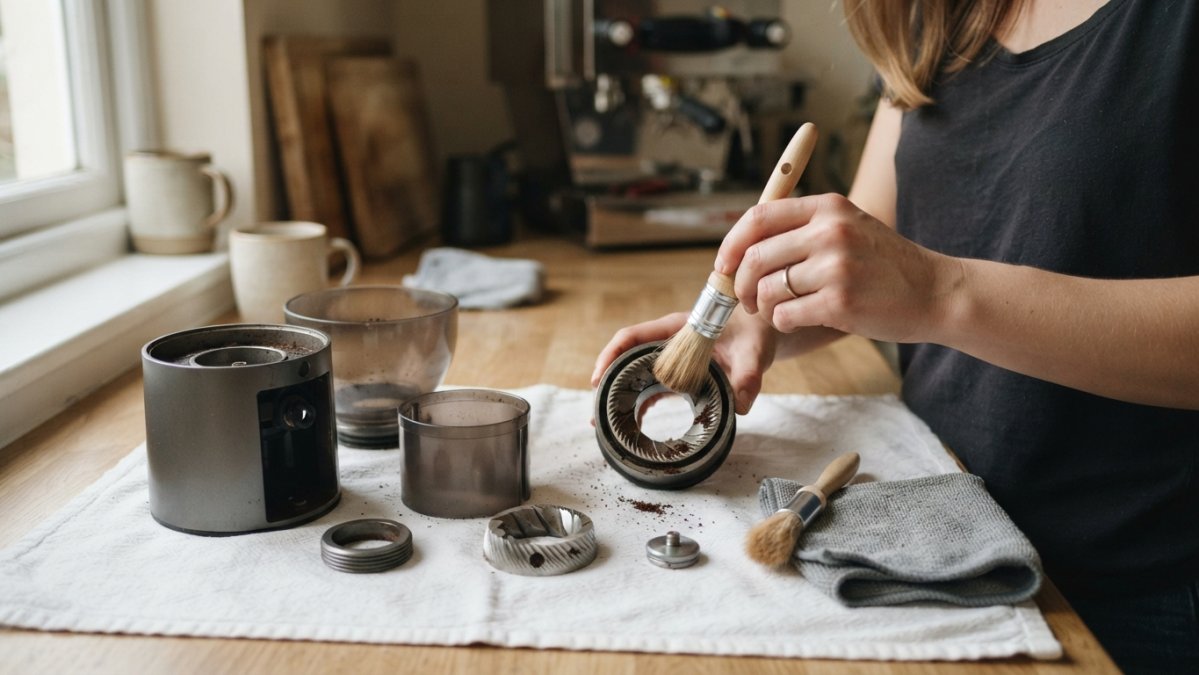
Disassemble carefully, removing burrs, hopper, grounds container and other removable parts. Keep track of small components and photograph each step for reassembly.
Clean all components thoroughly
Cleaning removes old coffee residue and oils that turn rancid.
For stubborn buildup, dampen the cloth slightly. Never soak parts or run them under a tap, excess moisture causes rust.
Pay special attention to the burrs: residue trapped between them can harden and affect grinding performance on reassembly.
Dry parts completely before storing
Moisture is the enemy of stored equipment. After cleaning, air dry each part for at least 30 minutes in a cool, dry room rather than using a cloth.
Run your finger across each part to check no droplets remain; even slight moisture leads to rust and corrosion.
How to Clean Coffee Grinder Burrs
Burrs are the grinding components that break down coffee beans. They need careful cleaning before storage to maintain sharpness and prevent hardened buildup.
Removing burr residue safely
Use a soft brass brush or old toothbrush to gently remove grounds from between the burrs, working slowly as they are sharp and delicate.
For conical burrs, brush from tip to base; for flat burrs, brush across the grinding surface.
Never use metal tools or hard brushes on burrs, as these scratch or dull the grinding surfaces and produce uneven grounds.
Inspection during cleaning
Inspect each burr as you clean for chips, cracks or flat spots.
Run your finger gently across the burr surface; it should feel smooth and sharp, not rough or dull.
If burrs show significant damage, replace them before storing, damaged burrs only worsen.
Essential Coffee Grinder Cleaning Tools
The right tools make cleaning easier and safer, and basic items work well.
Here's what we recommend:
- Soft brass brush: Gently removes grounds from burrs and crevices
- Microfibre cloth: Wipes surfaces without scratching
- Old toothbrush: Reaches tight spaces between components
A dedicated tool pouch keeps everything organised. The Comandante Tool Pouch made from merino wool protects brushes and cloths while staying breathable and water-resistant.

Keep these tools in one place so they're ready for regular maintenance and pre-storage cleaning.
How to Prevent Coffee Grinder Burrs from Rusting
Rust and corrosion damage metal burrs and other components, and prevention is simpler than dealing with rust later.
Moisture control strategies
Avoid damp areas like bathrooms or basements, where even a little airborne moisture starts the corrosion process.
Consider silica gel packets in your storage container to absorb airborne moisture, replacing them every few months.
Keep parts away from windows and direct sunlight, as heat and light speed up oxidation; a dark, cool cupboard is best.
Protective storage methods
Wrap individual burrs in soft cloth before placing them in the container, preventing scratches and adding a moisture barrier.
For long-term storage, wrap burrs in food-grade plastic wrap for extra protection, but only once completely dry.
Label your container with the grinder model and storage date so you can find parts quickly and track how long they've been stored.
Coffee Grinder Hopper Storage Best Practices
The hopper is the largest removable component on most grinders and the one most likely to be stored badly. Because it is bulky, people leave it attached, stack things on top of it, or seal it away while still slightly damp, habits that cause problems months later.
Empty, clean and fully dry the hopper first
Never store a hopper with beans inside, as residual beans release oils and moisture that have nowhere to go in a sealed container. Empty it completely, wipe with a dry microfibre cloth, and if you use a damp cloth for oily residue, air dry for at least an hour, plastic hoppers hold a thin film of moisture in seams and moulding lines.
Match the container to the hopper material
Most hoppers are made from one of three materials, each behaving differently in storage:
Comandante C40 Felt Sleeve (Anthracite) →
- Clear polycarbonate or acrylic: Lightweight and common on domestic grinders, but prone to scratching and to becoming brittle with age. Store in a soft cloth bag or a padded box rather than loose in a hard container, and keep it out of sunlight, which accelerates yellowing and cracking.
- Toughened glass: Found on some premium hand grinders and a few electric models. Glass is dimensionally stable and does not absorb odours, but it chips easily on impact. Wrap it in a cloth or felt sleeve and store it upright so the rim is not bearing weight.
- Stainless steel: Durable and odour-neutral, but heavier. A steel hopper can be stored in a sealed container without wrapping, though a cloth layer prevents it scratching other metal parts stored alongside it.
Do not seal a hopper while it is still warm or damp
A common mistake is washing a hopper, towel drying and sealing it immediately; towel drying leaves micro-droplets in corners. Leave it uncovered on a drying rack until at room temperature and visibly dry, then container it. A small silica gel packet adds insurance, but only once the hopper is dry, since silica gel cannot absorb moisture fast enough to save a wet component.
Store the lid, chute and any gaskets with the hopper
Hoppers are rarely a single piece: most have a lid, sometimes a bean stopper or sliding gate, and often a rubber or silicone gasket where the hopper meets the burr chamber. Keep these together in a labelled bag inside the same container, storing gaskets flat rather than folded, since creases prevent a proper seal later.
Organising spare hoppers and accessories
If you keep a spare hopper or swap between hoppers for different brew methods, store each one in its own labelled bag or compartment. A small divided box or a fabric tool roll works well for this, the Comandante Tool Bag made from cotton is sized for exactly this kind of small-parts organisation, and its breathable cotton construction means any residual moisture can escape rather than being trapped against the components.

Ventilation versus sealing, getting the balance right
Airtight storage is the right default for metal burrs, but not always for every hopper.
For long-term storage, label the container with the grinder model and date. If you own more than one grinder, or keep an old one as a backup, an unlabelled box of parts becomes a guessing game within a year.
Ideal Storage Environment for Grinder Components
Where you store grinder parts matters as much as how you store them: the right environment prevents rust, corrosion and warping, while the wrong one undoes all your careful cleaning.
Temperature and humidity targets
Aim for a stable room temperature between 15°C and 20°C with relative humidity below 50 percent, the same conditions that suit stored coffee beans, since both are damaged by heat, moisture and temperature swings.
Stability matters more than any single reading: a cupboard at 18°C year-round beats a shelf swinging between 10°C and 28°C, because repeated expansion and contraction stresses plastic and opens microscopic gaps in metal fittings where corrosion begins.
How to check a location before you commit
You do not need specialist equipment to assess a storage spot; a few simple checks will tell you most of what you need:
- The bread test: Put a slice of bread in the location overnight. If it goes stale and hard, the air is dry. If it goes soft and mouldy, the location is too damp for grinder parts.
- The salt test: A small dish of table salt left in a closed cupboard will clump if humidity is high. Check it after a week.
- A cheap hygrometer: A basic digital hygrometer costs very little and gives you a direct humidity reading. Place it in the cupboard for 24 hours before storing anything.
Locations to avoid
Some spots in a typical home are reliably unsuitable:
- Near the cooker, kettle or dishwasher: Steam and heat create localised humidity spikes that a cupboard door will not keep out.
- Bathrooms: Consistently high humidity, even in a closed cabinet.
- Basements and cellars: Cool and often damp, with poor air circulation.
Material-specific environmental risks
Not every component responds to the environment the same way:
- Steel burrs and springs: The main risk is rust. They need the driest conditions and benefit most from a sealed container with a silica gel packet.
- Ceramic burrs: Do not rust, but they are brittle. The main environmental risk is impact damage from being knocked, so store them wrapped and away from the edge of a shelf.
- Plastic hoppers, lids and grounds containers: Vulnerable to heat and UV. Warping and embrittlement are cumulative, so a location that is merely warm rather than hot will still shorten their life over years.
Odour and contamination control
Coffee equipment absorbs odours, so do not store grinder parts with cleaning chemicals, paint, solvents, spices or strongly scented items. Even a sealed container is not a perfect barrier over months, and a faint chemical or spice note is difficult to diagnose and impossible to remove from porous plastic.
Monitoring during long-term storage
If parts will be stored for more than a few months, check them every two to three months: open the container, inspect for rust, condensation or musty smell, and replace silica gel packets if they have absorbed moisture.
Protecting the location itself
Once you have chosen a suitable spot, protect it: keep the cupboard door closed to reduce dust and light, avoid placing the storage box directly against an external wall where condensation forms, and leave space around the container for air circulation.
For parts that will travel or be moved between locations, a padded bag or sleeve adds a layer of environmental protection as well as physical cushioning.

Long-Term Storage and Reassembly
Storing grinder parts for months or longer requires extra care, and proper planning makes reassembly straightforward.
Labelling and documentation
Create a simple parts list noting which parts go together and in what order, including any special instructions for your grinder model.
Label each container or bag with its contents and storage date, using waterproof labels that won't fade or peel.
Keep all documentation, manual, parts list, photos and service records, together in a plastic folder or envelope.
Preventing lost parts and damage
Use a checklist before storage, counting burrs, springs, screws and any other small components to verify you have everything.
Store small parts like springs and screws in separate, clearly labelled sealed bags to prevent loss or mix-ups.
The Comandante C40 Travel Bag provides premium protection for grinders and accessories during storage or travel.
Storing coffee grinder parts properly extends equipment life and maintains performance. Our range of protective accessories, including the Comandante C40 Felt Sleeve for grinder protection, helps preserve your investment.
Frequently Asked Questions
How should you store coffee grinder parts?
Store grinder parts in airtight containers in a cool, dry place away from direct light and heat. Clean and completely dry all components first. Keep burrs and metal parts in individual compartments to prevent contact and corrosion. Label containers clearly and store them in a pantry, cupboard, or drawer at room temperature. For long-term storage, use original packaging when available or wrap parts in breathable cloth to prevent moisture accumulation.
Can coffee grinder parts be stored in an airtight container?
Yes, airtight containers are ideal for storing grinder parts, especially burrs and metal components. They protect against moisture and humidity, which cause rust and corrosion. Ensure parts are completely dry before sealing to prevent condensation inside the container. Use food-grade containers or purpose-designed storage solutions. For parts that benefit from air circulation, such as cloth components, consider breathable storage pouches like the Comandante Tool Pouch instead.
How do you protect grinder parts from rust and damage?
Prevent rust by keeping parts in a dry environment with stable room temperature and low humidity. Store metal burrs and springs separately to avoid contact that causes scratching. Use protective sleeves or pouches, such as the Comandante C40 Felt Sleeve, which provide temperature insulation, are water-resistant, and shield parts from dust and light. Avoid storing near kitchens sinks or damp areas. Inspect parts periodically for signs of corrosion and store them away from direct heat sources.
Should coffee grinder parts be completely dry before storage?
Yes, all parts must be completely dry before storage to prevent rust, mould, and corrosion. After cleaning, use a soft, dry cloth to remove all moisture and allow parts to air-dry in a well-ventilated area for at least 30 minutes. Pay particular attention to burrs, springs, and the hopper, which trap moisture easily. Ensure no water droplets remain before placing parts in containers. Dry storage conditions also extend the life of plastic and rubber components.