

How to Steam Professional Quality Milk at Home
Table of Contents
- How to Steam Professional Quality Milk at Home: The Core Technique
- Step-by-Step: How to Texture Milk With a Steam Wand
- Milk Steaming Temperature: When to Stop Steaming
- The Best Milk for Steaming: Dairy and Plant-Based Options
- Common Milk Steaming Mistakes and How to Fix Them
- How Machine and Steam Wand Differences Affect Your Results
- Conclusion
- Frequently Asked Questions
Last Updated: October 4, 2026
How to Steam Professional Quality Milk at Home: The Core Technique
Steaming professional quality milk at home comes down to three things: cold milk, correct wand placement, and stopping at the right temperature.
Most home baristas struggle because they treat steaming as one long blast of steam. It is not. It is two stages: adding air, then heating and texturing.
Below, we show you exactly how to steam professional quality milk at home, including the temperatures to aim for, which milks behave best, and the mistakes that ruin texture.
What You'll Need Before You Start
You need four things to texture milk properly:
- A steam wand, either on an espresso machine or a standalone frother
- A stainless steel milk pitcher, ideally 350-600ml for one or two drinks
- Cold milk, straight from the fridge
A pitcher with a pointed spout helps with pouring and latte art. A round, wide base gives the milk room to spin.

Specialty Coffee Association guidance on milk steaming and beverage standards
Step-by-Step: How to Texture Milk With a Steam Wand
Texturing milk means adding air to create microfoam, then spinning the milk to break that foam into tiny, even bubbles. The whole process takes 20 to 40 seconds on most machines. Follow the three steps below in order.
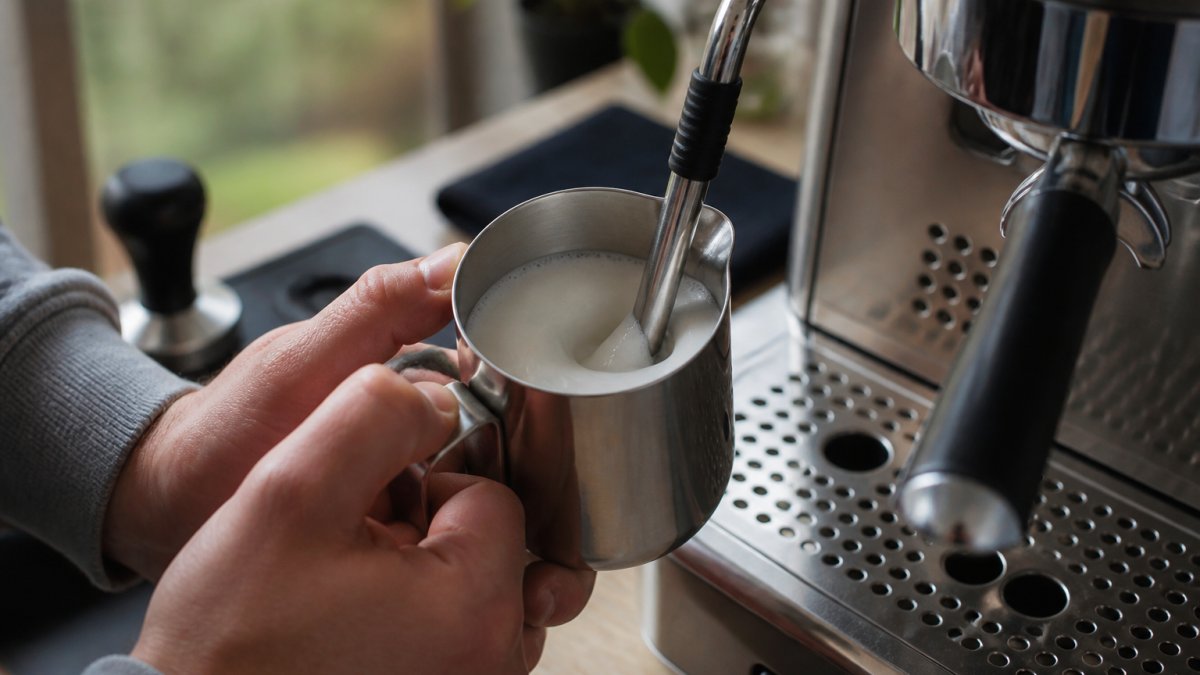
Step 1: Fill the Pitcher and Purge the Wand
Fill the pitcher to just below the base of the spout. For a 350ml pitcher, that is roughly 150-180ml of cold milk, enough for one drink with a little room to spare.
Now purge the wand. Open the steam valve for one or two seconds into a cloth to blast out trapped condensation. Skipping this adds water to your milk and kills texture before you begin.
Step 2: Position the Wand Tip and Create the Whirlpool
Place the steam tip just below the milk surface, slightly off-centre. Angle the pitcher so the steam enters at a shallow angle.
Done right, the milk starts to rotate in a steady whirlpool. This rotation is what folds air through the milk and builds even texture. If nothing spins, tilt the pitcher a little more.
Step 3: Add Air, Then Heat and Texture in Stages
Lower the pitcher a fraction so the tip breaks the surface. You will hear a soft, papery hiss. That is air entering the milk.
Then raise the pitcher slightly so the tip sits just under the surface and stops gulping air. Keep the whirlpool going.
Stop when the pitcher feels hot to the touch and the milk reaches 55-65°C. Tap the pitcher on the counter and swirl it to knock out any remaining bubbles.
Milk Steaming Temperature: When to Stop Steaming
Milk steaming temperature is the single biggest factor in texture, and most home baristas overshoot it.
Above roughly 70°C, milk proteins start to change and the taste turns flat and slightly cooked. The foam also gets stiff and dry.
If you have no thermometer, use your hand. Hold the pitcher and count. Once it is too hot to hold comfortably for more than a second or two, you are close.
The Best Milk for Steaming: Dairy and Plant-Based Options
The best milk for steaming is fresh, cold whole dairy milk. Its fat and protein content builds stable microfoam with a natural sweetness. Semi-skimmed works too, with a lighter body. But the milk you choose changes how you steam it, not just how it tastes, so it is worth understanding what each type does under steam.
Why dairy behaves the way it does
Milk foam is a protein structure. The proteins coat air bubbles and hold them in place, while fat adds body and slows the bubbles from draining and collapsing.
- Whole milk (around 3.5% fat): The most forgiving. Builds glossy microfoam that holds its shape in a flat white and pours clean lines for latte art.
- Semi-skimmed (around 1.7% fat): Foams readily but the texture is lighter and drains a little faster. Fine for a cappuccino, less ideal for fine latte art.
- Skimmed: High protein, so it stretches easily, but the foam is stiff and dry rather than glossy. It also scalds more noticeably.
A practical rule: the lower the fat, the less time you have before the foam turns stiff. If you are using skimmed or semi-skimmed, shorten the aeration stage by a second or two.
Sage The Dual Boiler Black Truffle Espresso Machine →
Plant-based milks: what actually happens under steam
Plant milks are emulsions of oil, water and plant protein, and they vary far more than dairy. Some foam well, some split, and some collapse the moment the steam stops. Here is how the common types behave and how to adjust:
- Barista oat: The most reliable plant option. Oat base plus added rapeseed or sunflower oil mimics dairy's fat behaviour, so it stretches and pours clean. It is naturally sweet and pairs well with medium roasts. Steam it slightly cooler, around 55-60°C, because it thickens and turns gluey if pushed hotter.
- Soy: Good protein content, so it foams readily and holds texture well. Watch for a slight beany note that can clash with fruity espresso. Standard soy is more stable than many people expect; barista versions add oil for extra gloss.
- Almond: Thinner and quicker to split. The low protein and fat content means bubbles drain fast. Use barista versions, which add stabilisers, and keep the aeration brief.
The adjustments that matter
Whatever you pour, three variables change the result:
- Start cold. Milk straight from the fridge, around 4°C, gives you the longest window to add air before the proteins set. Warm milk from the start gives you less time to work.
- Use a cold pitcher. A chilled pitcher slows the temperature climb and buys you a few extra seconds of aeration.
- Watch the ceiling. Dairy tolerates up to about 65°C before it scalds. Oat and soy are happier closer to 55-60°C. Coconut and almond are least tolerant of heat and split earliest.
If you switch milks, expect to re-learn your stop point. The same machine, the same wand and the same pitcher will give you a different texture from oat than from whole dairy, and the difference is largest in the last five degrees.
Common Milk Steaming Mistakes and How to Fix Them
Most milk steaming mistakes come down to timing, wand depth, or temperature. Fix those three and the rest follows.
Troubleshooting by Symptom
Match your problem to the fix below:
| Symptom | Likely Cause | Fix |
|---|---|---|
| Loud screeching | Tip too deep or too shallow | Reposition just below surface |
| Large bubbles on top | Too much air, too fast | Shorten the aeration stage |
| Thin, watery milk | Not enough air added | Lower pitcher briefly at start |
| Foam collapses | Overheated past 70°C | Stop at 55-65°C |
| No whirlpool | Pitcher angle too flat | Tilt pitcher and move off-centre |
How Machine and Steam Wand Differences Affect Your Results
Your machine sets the ceiling on what you can achieve, but the more useful question is how to adapt your technique to the wand you actually have. Most guides assume a café-grade wand. Here is how to adjust for the common home setups.
Single-hole versus multi-hole tips
The number of holes changes the flow rate and how forgiving the wand is.
- Single-hole tip: Gentler, slower flow. You get more time to position the tip and add air, which makes it the easiest to learn on. The trade-off is that it takes longer to heat the milk, so the aeration stage can feel rushed if you are impatient.
- Two-hole tip: A good middle ground. Enough flow to heat quickly, still controllable. Many home machines use this.
- Four-hole (or more) tip: Fast and powerful, but far less forgiving. The milk heats before you have finished adding air, so you must position the tip correctly from the first second. If your milk is thin and hot, a multi-hole tip is often the cause.
With a multi-hole tip, start your aeration earlier and stop it sooner. With a single-hole tip, you can afford to be more deliberate.
Low-power and single-boiler machines
A single-boiler machine forces you to wait between brewing and steaming, and steam pressure often drops mid-pour. The practical fix is to steam first, then brew, so the boiler is at full pressure when you need it.
Low-power machines also recover pressure slowly. If your steam feels weak halfway through, you are likely asking the boiler for more than it can give.
Automatic and assisted steam systems
Some machines offer automatic steam wands or preset milk texturing. These remove the manual aeration stage, which is helpful for consistency but limits your control. If your machine has a manual override, use it while you are learning so you can feel the stages. If not, treat the preset as a starting point and adjust the milk volume or pitcher size to change the texture.
What to look for in a machine
Consistent steam pressure matters more than raw power. A machine that holds steady pressure gives you repeatable texture every single time. Dual boilers help because they let you brew and steam at once, with no recovery wait.

At Coffee Craft Studio, we stock machines built for this exact job. The Sage The Dual Boiler Black Truffle Espresso Machine uses separate boilers for brewing and steam, so you can texture milk while pulling a shot.
For those wanting commercial-grade performance, the La Marzocco Linea Mini brings café engineering into a compact frame, with dual boilers and strong steam output.
Conclusion
Getting milk texture right takes practice, but the variables are few: cold milk, correct wand depth, a steady whirlpool, and stopping at 55-65°C. Nail those and café-quality results follow.
If your current machine keeps letting you down, the equipment itself may be the limit. At Coffee Craft Studio, we offer expertly curated espresso machines built for precision and performance, with dual boiler systems that let you brew and steam at once and steam wands designed for proper microfoam.
Choose options from Coffee Craft Studio and start pouring the texture your espresso deserves.
Frequently Asked Questions
What temperature should milk reach when steaming?
Stop steaming when the milk reaches 55-65°C. At this range, the milk is hot enough to drink but the proteins have not yet scalded, so the texture stays sweet and glossy. If you do not have a thermometer, use the pitcher's handle: when it becomes too hot to hold comfortably for more than a second or two, you are close. Pull the wand out immediately and swirl the pitcher to redistribute the foam before pouring.
Why is my steamed milk too bubbly?
Large bubbles usually mean you added air too late or too aggressively. Aeration should happen only in the first few seconds, with the wand tip just below the surface. After that, submerge the tip deeper to create a rolling whirlpool that breaks bubbles down into microfoam. If bubbles persist, tap the pitcher firmly on the counter and swirl for a few seconds before pouring. Using cold milk and a cold pitcher also gives you more time to texture correctly.
Can you steam milk without an espresso machine?
You can heat and froth milk with a stovetop pan and a whisk or a standalone milk frother, but you will not get the same microfoam texture as a steam wand. A steam wand injects air under pressure and creates a whirlpool that breaks bubbles into a fine, glossy foam. If you are serious about café-quality results at home, a machine with a dedicated steam boiler, such as the Sage The Dual Boiler, gives you the pressure and control needed for proper texturing.
Is steamed milk just heated milk?
No. Steamed milk has air incorporated into it, which changes both texture and flavour. The goal is microfoam: tiny bubbles that give the milk a silky, glossy finish and a sweeter taste because the proteins and sugars have been gently heated. Heated milk without aeration stays flat and thin. The difference is most obvious in a flat white or latte, where microfoam creates the smooth, velvety layer that sits on top of the espresso.