

How to Calibrate Espresso Grinder for Home Use
Table of Contents
- What Grinder Calibration Means for Espresso
- Preparing and Cleaning Your Grinder Before Calibration
- Espresso Grinder Calibration Steps: A Practical Workflow
- Espresso Grind Size Adjustment: Finer or Coarser
- Espresso Dose and Yield Ratio: Finding Your Recipe
- How Often to Clean an Espresso Grinder and Recalibrate
- Common Mistakes to Avoid When Calibrating
- Frequently Asked Questions
Last Updated: October 10, 2026
What Grinder Calibration Means for Espresso
To calibrate espresso grinder burrs is to adjust them to produce a consistent particle size that extracts espresso properly. It's the foundation of pulling repeatable shots at home. Without calibration, your grind size drifts, your extraction times vary wildly, and your espresso tastes unpredictable.
Calibration finds the sweet spot where water flows at the right speed, too coarse and your shot is sour and thin; too fine and it becomes bitter and choked.
A properly calibrated grinder delivers repeatability: dial in once, then pull identical shots for days. That consistency separates home espresso from café-quality espresso.
Preparing and Cleaning Your Grinder Before Calibration
Start with a clean grinder. Empty the hopper, run it empty for 10-15 seconds, brush the chute and burr chamber, and wipe removable burrs with a dry cloth. For heavy residue, use a grinder-cleaning product designed for espresso machines. Clean grounds ensure your test shots reflect actual performance.
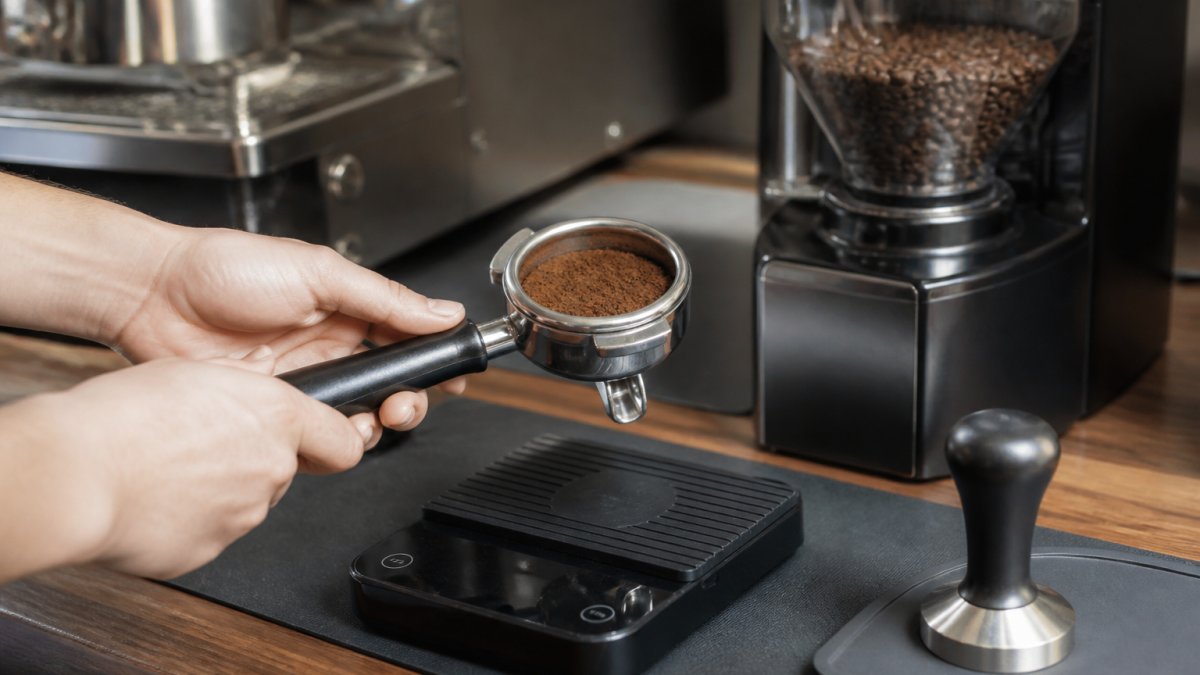
Espresso Grinder Calibration Steps: A Practical Workflow
To calibrate espresso grinder properly, follow this cycle: grind, weigh, pull, taste, adjust. Repeat until your shots hit your target.
Step 1: Choose Your Starting Grind Setting
Pick a starting point on your grinder's dial, usually setting 15-20 for numbered grinders, or a marked medium position for stepless models. You're simply establishing a baseline.
Step 2: Weigh Your Coffee Dose
Use a digital scale accurate to 0.1 grams. A standard espresso dose is 18-20 grams for a double basket; 18g is a solid starting point. Dose consistency keeps extraction variables constant so only grind size changes as you dial in.
Step 3: Pull and Time Your Test Shot
Tamp evenly and pull a shot. Time how long it takes from when water starts flowing until you've pulled roughly 36-40 grams of espresso (the yield).
Your target is usually 25-30 seconds. If your shot pulls in 15 seconds, it's too coarse. If it takes 45 seconds, it's too fine.
Write down the time. You'll use this to decide your next adjustment.
Step 4: Adjust Grind Size and Purge Retained Grounds
If your shot was too fast, move finer; if too slow, move coarser. Make ONE click at a time, changing multiple settings makes it impossible to know what worked. After adjusting, purge 5-10 grams of ground coffee to clear retained grounds, then grind a fresh dose and pull another shot.
Espresso Grind Size Adjustment: Finer or Coarser
The direction of your adjustment depends on your last shot's performance, but how you adjust varies significantly by grinder type and design.
Adjustment Direction and Shot-Time Targets
| Shot Result | Adjustment | Why |
|---|---|---|
| Pulled in under 20 seconds | Move finer | Water flowed too fast |
| Pulled in 25-30 seconds | No change needed | You've dialled in |
| Pulled in over 40 seconds | Move coarser | Water flowed too slowly |
One click typically changes shot time by 2-5 seconds, depending on burr geometry and adjustment resolution.
Grinder-Type Considerations
Stepped grinders move in fixed increments; adjust one click at a time for clear results. Stepless grinders allow infinite micro-adjustments; mark your starting position and make small, deliberate turns to avoid overshooting. Single-dose grinders retain almost no grounds, so adjustments take effect immediately. Hopper-fed grinders retain grounds in the burr chamber, so adjustments may not fully show until you've purged 2-3 doses.
Purging Strategy and Retained Grounds
After adjusting, retained grounds from the previous setting will distort your test shot. Purge 5-10 grams of freshly ground coffee before pulling your next shot. For hopper-fed grinders, grind into a waste bin and discard; for single-dose grinders, load a small amount and grind it away. Skipping this step leads to inconsistent results.
Adjusting While the Grinder Runs
Some stepless grinders require adjustment while running; check your manual. If live adjustment is allowed, turn the dial slowly and deliberately. If the motor must stop, switch it off before adjusting. Never adjust a stepped grinder while running unless the manufacturer permits it.
Burr Zeroing vs. Routine Dialling-In
Do not confuse routine grind adjustment with burr zeroing (setting mechanical zero), a one-time calibration performed only when burrs are new or replaced. Only zero your burrs if you've just installed new ones, your manual instructs you to, or you suspect burr shift from damage. Routine dialling-in simply means finding the grind setting for your target shot time; the burrs stay in their factory-set position.
The Adjustment Cycle
After each adjustment, purge 5-10 grams, grind a fresh dose, pull a test shot, time it, and record notes. This cycle usually takes 4-8 attempts. Patience and single-variable changes are your best tools.
Espresso Dose and Yield Ratio: Finding Your Recipe
Once dialled in, lock in your dose and yield ratio. A common ratio is 1:2 (18g in, 36g out); lighter roasts often prefer 1:2.5 or 1:3, darker roasts 1:1.5 or 1:2. Stick with what tastes good to keep variables consistent.
How Often to Clean an Espresso Grinder and Recalibrate
Calibration is not a fixed setting. It drifts over time and in response to environmental and coffee changes. Understanding why helps you know when to recalibrate and what to adjust.
Cleaning Frequency
Deep-clean every 2-4 weeks depending on use: light use (1-2 espressos daily) every 4 weeks, moderate use (3-4 daily) every 2 weeks, heavy use (5+ daily) weekly. Oil and fine-particle buildup slow water flow and add stale flavour; a clean grinder is the foundation of stable calibration.
Why Calibration Drifts: Bean Age and Freshness
Fresh coffee (3-14 days from roast) contains moisture and CO₂ that affect flow; as beans age, they lose moisture and become denser. Fresh beans often require a slightly coarser setting than the same beans at 4 weeks old. If your beans are older than 3 weeks, expect calibration to feel off. Fresh beans will taste noticeably better once dialled in.
Baratza Encore ESP Coffee Grinder (Black) →
Roast Level and Grind Stability
Darker roasts are more brittle and produce finer particles at the same setting; lighter roasts are denser and grind coarser. When switching roast levels, expect to recalibrate by 1-3 clicks. Keep notes on grind settings for each roast to save time when returning to a familiar coffee.
Environmental Effects: Humidity and Temperature
High humidity (above 60%) makes beans denser, shifting grind finer and slowing shots. Low humidity (below 40%) makes beans brittle, shifting grind coarser and speeding shots. Temperature shifts of 5-10 °C are usually negligible; larger changes warrant a recalibration check. If shot times creep over weeks with the same beans and setting, humidity or temperature is likely the culprit, a quick 1-2 click adjustment usually restores target timing.
Recalibration Frequency
Recalibration isn't always necessary. If your grinder is clean, your beans are fresh, and your shots taste consistent, your calibration is probably still solid.
Recalibrate when:
- Your shot times creep noticeably longer or shorter over 1-2 weeks (sign of bean age or environmental drift)
- You switch to a new coffee with a different roast level
- You notice channeling, uneven flow, or a sudden change in taste despite no grinder adjustment
- You've just cleaned the grinder thoroughly (cleaning can shift the burr position slightly)
- More than 4-6 weeks have passed since your last calibration and conditions have changed
You probably don't need to recalibrate if:
- Your shot times are stable week to week
- You're using the same coffee and it's still fresh
- Your taste notes are consistent
- Environmental conditions (humidity, temperature) haven't shifted significantly
Troubleshooting Beyond Shot Time
Shot time is a useful metric, but it's not the only clue. Use these complementary signals to diagnose calibration issues:
Flow appearance: Water should flow steadily and evenly from the spout. If it sprays, gushes, or stops and starts, your puck may be unevenly distributed or your grind may be too coarse. If it drips slowly or stops, your grind may be too fine or your tamp too hard.
Channeling (visible gaps or streams in the puck after pulling): This suggests uneven grind size, poor distribution, or a grind that's too coarse. Move finer and check your distribution technique.
Puck condition: After pulling, knock the puck out and inspect it. A properly dialled shot should produce a puck that holds together and comes out cleanly.
Taste: Sour espresso usually means under-extraction (grind too coarse or shot time too short). Bitter espresso usually means over-extraction (grind too fine or shot time too long).
Pressure gauge (if your machine has one): Espresso machines typically operate at 9 bars. If your pressure is consistently low (under 8 bars), your grind is too coarse.
Common Mistakes to Avoid When Calibrating
Adjusting multiple variables at once. Change grind size only. Keep dose and yield constant until you've dialled in.
Not purging between adjustments. Retained grounds from your last grind will sit in the burr chamber and interfere with the next shot.
Pulling only one test shot per adjustment. One shot isn't enough data. Pull at least two shots at each setting to confirm consistency.
Ignoring coffee freshness. Fresh coffee (3-14 days from roast) behaves differently than stale coffee.
Skipping the scale. Weighing your dose removes guesswork. Eyeballing or using a scoop introduces variables that make calibration impossible.
Not cleaning the grinder first. Old oils and stale grounds will throw off your test shots. Start with a clean grinder every time.
Calibrating an espresso grinder for home use takes patience, but it transforms your daily coffee ritual. The Baratza Encore ESP grinders, available through Coffee Craft Studio, come pre-calibrated from the factory with precision-engineered 40mm hardened alloy steel burrs, so you start from a solid baseline. Whether you choose the Baratza Encore ESP for straightforward micro-step adjustments or the Baratza Encore ESP Pro with stepless grind control and auto-stop dosing, both deliver the repeatability and grind resolution you need to dial in café-quality espresso consistently.


Frequently Asked Questions
How do I know if my espresso grind is too fine or too coarse?
If your espresso shot pulls too quickly (under 20 seconds) and tastes sour, your grind is too coarse. If it pulls too slowly (over 35 seconds) and tastes bitter, your grind is too fine. The ideal shot time is 25-30 seconds. Adjust one variable at a time: move your grind setting finer to slow the flow, or coarser to speed it up. Pull a test shot after each adjustment to assess the change.
What should my espresso dose and yield ratio be?
A standard double espresso uses an 18 g dose to produce approximately 36-40 g of liquid (a 1:2 brew ratio). Weigh your coffee dose precisely before tamping, then weigh the shot volume in your cup or on a scale. This ratio produces balanced espresso with good body and flavour. Adjust your dose if your machine's basket requires it, some 54 mm baskets hold 16 g, whilst 58 mm baskets typically hold 18-20 g.
How often do I need to recalibrate my espresso grinder after cleaning?
After emptying the hopper and cleaning the burrs, your grinder's calibration point may shift slightly. Pull a test shot with your usual grind setting to check if the shot time has changed. If it pulls noticeably faster or slower than before, adjust your grind setting by one click at a time until you return to 25-30 seconds. Deep cleaning with a brush or grinder cleaning tablet requires a recalibration check, but daily use typically maintains your calibration.
Should I adjust grind size or dose first when dialling in espresso?
Start by adjusting your grind size, not your dose. Keep your dose constant (e.g., 18 g) and change only your grind setting until you achieve a 25-30 second shot time. Once your grind is dialled in, you can fine-tune your dose if needed for taste preference. Changing one variable at a time makes it clear which adjustment caused the change in flavour and flow rate.