

7 Home Espresso Bar Layout Ideas That Actually Work
Last Updated: October 26, 2026
Quick Summary
An espresso bar layout is the arrangement of your machine, grinder, and tools within a work zone that keeps every movement short and every surface clear. Plan it around your counter width, your household's brewing routine, and three zones: prep, brew, and finish.
- Measure clear worktop width, depth from wall to edge, and height to any wall unit before buying equipment.
- Keep prep, brew, and finish zones in order, reversing the sequence for left-handed brewers.
- Allow at least 10cm above the machine, or 15cm for top-loading water tanks.
- Place the grinder on your dominant side and cups directly above the machine.
- Add a second knock box on the opposite side for shared households brewing in quick succession.
Table of Contents
- Start With Your Counter Width, Not the Machine
- Small Coffee Bar Ideas for Narrow and Rented Kitchens
- Built-In Nooks and Cabinet Conversions
- Coffee Bar Storage Ideas That Keep Tools Off the Worktop
- Coffee Bar Organisation: Grinder, Milk and Cup Placement
- Layouts That Match How Your Household Actually Brews
- Plan Your Espresso Bar Layout With Coffee Craft Studio
- Frequently Asked Questions
Start With Your Counter Width, Not the Machine
The most common home espresso bar layout mistake is buying the machine first and finding the space second. A good espresso bar layout is a space-planning problem long before it is an equipment problem.
An espresso bar layout is the arrangement of your machine, grinder, and tools within a work zone that keeps every movement short and every surface clear. Get the arrangement right and a modest setup feels effortless. Get it wrong and even a premium machine becomes a daily frustration.
Below, we show you how to plan layouts for different kitchen spaces.
Measuring the Space You Actually Have
Start with three numbers: the width of clear worktop, the depth from wall to edge, and the height to the underside of any wall unit.
Write them down. Then subtract the width of your tallest appliance. What is left is your true working room, and it is usually less than people expect. A common mistake is measuring only the machine and forgetting the grinder beside it.
The Three-Zone Rule for Any Espresso Station Setup
Every espresso station setup needs three zones: prep, brew, and finish. Prep holds the grinder and scale. Brew holds the machine. Finish holds cups, the knock box, and the milk pitcher.
Keep the zones in that order, left to right or right to left depending on your handedness.
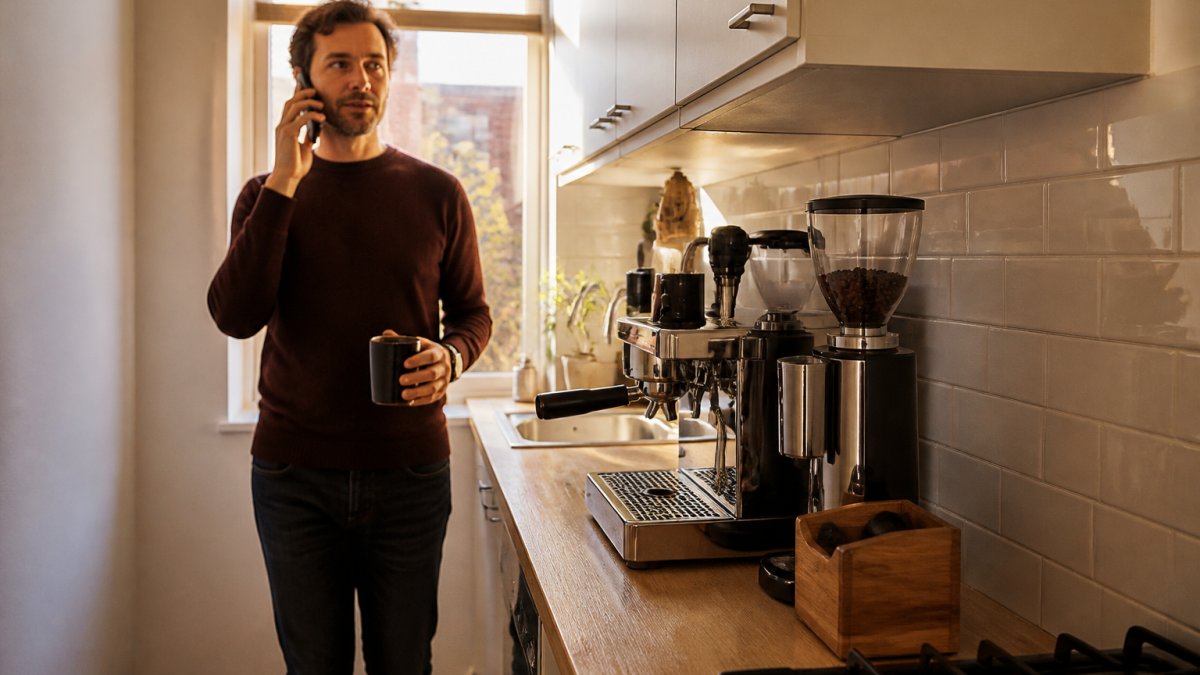
Small Coffee Bar Ideas for Narrow and Rented Kitchens
Small coffee bar ideas live or die on vertical space. When the worktop is 60cm wide, you build upward and you build in a line.
Stack cups on a wall shelf above the machine. Mount the grinder on a slim riser so the hopper clears the wall unit. Keep the knock box flush against the machine's side rather than in front of it.
For rented kitchens, choose freestanding pieces with no drilling. A slim trolley or a butcher's block on castors turns a dead corner into a working espresso bar and moves out when you leave.
Built-In Nooks and Cabinet Conversions
A built-in cabinet conversion gives you the most controlled espresso bar layout of all, because you decide the height, the depth, and the lighting before anything goes in. But a nook that looks beautiful in a photograph can become a daily irritation if you skip the practical planning.
Measure for the machine, not the cupboard
Start with the machine's full footprint including the portafilter handle fitted. A common error is converting a standard 60cm-deep base unit without checking that the handle clears the door frame when the machine sits flush against the back panel. If the handle protrudes beyond the worktop edge, you will either leave the door open permanently or angle the machine awkwardly.
Allow at least 10cm of clearance above the machine for loading beans and lifting cups. For machines with a top-loading water tank, increase this to 15cm so you can fill without removing the tank. Never enclose the grinder so tightly that you cannot reach the hopper, a minimum of 5cm on each side keeps refilling practical.
Ventilation and heat
Espresso machines push out real heat, particularly during back-to-back shots. An enclosed cupboard without ventilation will trap that heat and make the space uncomfortable to work in. If you are converting a cabinet, consider removing the back panel or fitting a vent grille to allow air to circulate. Leave a gap of at least 5cm between the machine's rear and the wall or cabinet back.
Electrical and water access
Plan the power before the cabinetry. You will need at least one socket for the machine and one for the grinder, ideally on a dedicated circuit if your machine draws high wattage. Avoid trailing leads across the worktop, a double socket positioned inside the nook at counter height keeps cables tidy and accessible. If you are planning a plumbed-in machine, factor in the water supply and drainage before the cabinet is built, as retrofitting these is far more disruptive.
Lighting
Under-cabinet lighting is not decorative here, it is functional. A warm LED strip mounted at the front underside of the cabinet illuminates the group head and drip tray without casting shadows from your body. Choose a colour temperature around 3000K for a warm, inviting glow that flatters the station.
If you are converting a cabinet, these are the clearances and services the article says to plan for before anything goes in.
| Item | Value | Note |
|---|---|---|
| Clearance above machine | At least 10cm | For loading beans and lifting cups |
| Clearance above top-loading tank | 15cm | So you can fill without removing the tank |
| Grinder side clearance | Minimum 5cm each side | Keeps hopper refilling practical |
| Gap behind machine | At least 5cm | Between machine rear and wall or cabinet back |
| Sockets | One for machine, one for grinder | Ideally a dedicated circuit for high wattage |
| Lighting | Warm LED strip, around 3000K | Mounted at front underside of cabinet |
| Ventilation | Remove back panel or fit vent grille | Never enclose without ventilation |
Coffee Bar Storage Ideas That Keep Tools Off the Worktop
Coffee bar storage ideas should remove clutter, not relocate it. The goal is a clear worktop with everything within arm's reach.
Universal Walnut Coffee Accessories Organiser →
The Hub 3-in-1 Espresso Knock Box, Tamping Station & Tamper Holder combines a knock box, tamping station, and tamper holder into one compact unit at 17.4 x 17.4 x 7.5cm. The Universal Walnut Coffee Accessories Organiser keeps tampers, distributors, and WDT tools in two recessed compartments.


- Knock box: beside the machine, never in front
- Tamper and distributor: on the tamping station
- Cups: above or beside the group head
- Beans: in sealed storage, away from heat
Coffee Bar Organisation: Grinder, Milk and Cup Placement
Coffee bar organisation comes down to one question: which hand does what? Place the grinder on your dominant side, the milk pitcher on the other, and the cups directly above the machine.
Milk is the item most people get wrong. Keep it in a small fridge or cool bag within reach rather than walking to the main fridge mid-shot. A 600ml milk frothing pitcher with thermometer lets you monitor milk temperature while steaming.
Cups belong close to the group head. The Loveramics Tumbler Espresso Cup is an 80ml porcelain cup.
Layouts That Match How Your Household Actually Brews
A one-espresso-a-day household needs a different espresso bar layout from a household pulling six flat whites before nine. Match the layout to the routine, not to a photograph. Most layout guides show a single idealised station, but the reality is that your household's brewing pattern should dictate the arrangement.
Solo brewer: the linear station
If you are the only person using the station, a compact line along one wall works well. Place the grinder on your dominant side, the machine in the centre, and the knock box and cups on the other side. This keeps every movement short and predictable. A 60cm-wide worktop is sufficient if you stack cups vertically on a shelf above the machine and keep the knock box flush against the machine's side rather than in front of it.
Shared household: the split station
When two people brew together, or in quick succession, congestion is the enemy. Split the station so each person has their own approach. One common pattern is to place the grinder and tamping area on one side and the milk frothing and finishing area on the other, with the machine in the middle. This allows one person to grind and tamp while another steams milk without crossing arms.
If space allows, add a second knock box on the opposite side of the machine. It sounds excessive until you are both trying to empty a portafilter at the same moment.
Entertaining: the expanded station
For households that regularly entertain, plan for volume. A larger milk pitcher (600ml or 1L) reduces refilling mid-service. A second knock box or a larger-capacity model prevents constant emptying. Keep a stack of cups ready on a shelf at shoulder height so you are not reaching into a cupboard between shots.
Consider a dedicated rinse sink or a small jug of water for cleaning the portafilter between shots, this becomes essential when pulling a dozen espressos in an evening.
The workflow rule that applies to all layouts
Regardless of household size, keep the three zones, prep, brew, finish, in a logical order. For right-handed brewers, prep on the left, brew in the centre, finish on the right. Left-handed brewers should reverse this. The goal is to minimise reaching across the machine and to keep the portafilter path clear.
If you weigh your shots, a mini espresso scale with timer belongs on the drip tray, so keep that space clear from the start. Precision matters more than decoration here.

Plan Your Espresso Bar Layout With Coffee Craft Studio
The best espresso bar layout is the one you plan around your space, your routine, and your tools, in that order. Machine last, always.
We offer machines, grinders, and accessories, including the La Marzocco Linea Mini. Browse the range, measure your counter, and build a station that earns its space every morning.
Frequently Asked Questions
How much counter space do you need for an espresso machine?
Allow for the machine's own footprint plus clearance on both sides. Add a further 20 to 30 cm for a grinder and 15 cm for a knock box. Measure your worktop depth before you commit, and check overhead cupboard clearance too, because you need to lift the water tank and fill it.
Where should a coffee bar go in a small kitchen?
Pick the run of worktop furthest from the hob and sink, so steam, splashes and cooking grease stay away from the machine. A wall with a spare socket is ideal. If worktop space is genuinely tight, a converted cabinet or a shelf-lined nook keeps the espresso bar layout compact without eating into food prep space. Keep the grinder beside the machine rather than across the room, so you are not carrying a full portafilter around.
How do you organise an espresso station so it stays tidy?
Give every tool a fixed home. The Universal Walnut Coffee Accessories Organiser has two recessed compartments for espresso accessories, and The Hub combines a knock box, tamping station, and tamper holder in one compact unit.
Do you need a dedicated grinder for an espresso bar layout?
Yes, if you want repeatable shots. The Baratza Vario W+ is a weight-based grinder with three programmable presets. Place it immediately to the right or left of the machine, within arm's reach, so the ground coffee goes straight into the portafilter. Keeping the grinder close shortens your workflow and reduces mess on the worktop.
Ready to build a station that works as hard as you do? Get started with Coffee Craft Studio and choose options that fit your counter, your routine, and your coffee.
