

Espresso Machine Water Hardness Test Kit Guide
Table of Contents
- Why Water Hardness Decides How Long Your Espresso Machine Lasts
- How to Test Water Hardness at Home
- Using Espresso Machine Water Hardness Test Strips
- Reading Your Results: Units, Thresholds and What They Mean
- Turning Results into a Treatment Decision
- Setting the Espresso Machine Water Hardness Setting
- Choosing an Espresso Machine Water Filter
- Test Accuracy, Repeatability and Troubleshooting
- Conclusion
- Frequently Asked Questions
Last Updated: October 20, 2026
Why Water Hardness Decides How Long Your Espresso Machine Lasts
Water hardness is the concentration of dissolved calcium and magnesium in your water, and it is the single biggest factor in how long an espresso machine lasts. That scale builds on elements, in boilers and inside valves. Left alone, it narrows the flow path and forces the pump to work harder.
This guide from Coffee Craft Studio walks through testing, reading the result, and turning it into a decision.
How to Test Water Hardness at Home
Testing water hardness at home takes three steps: draw a representative sample, add the reagent or dip the strip, then match the colour or drop count to a chart. The whole process runs under five minutes and needs no special equipment beyond the kit itself.
A guide from the Drinking Water Inspectorate confirms that hardness varies enormously by supply zone, so your neighbour's result may not match yours. Test your own tap.
Taking a Representative Water Sample
Use cold water straight from the kitchen tap. Run it for a few seconds first to clear the standing water in the pipe.
Fill a clean glass or a white cup. White matters: you need to judge a colour change against a neutral background.
Test the water you actually brew with. If your machine is plumbed in behind a filter, draw the sample from the machine's water outlet, not the tap.
Drop-Count Kits Versus Strips
Drop-count kits add reagent one drop at a time until the sample changes colour. You count the drops and multiply by the kit's conversion factor. They are the more precise option and suit anyone who wants a number they can act on.
Strips are faster. Dip, wait, compare to the colour chart. The trade-off is resolution: strips give you a band, not a precise figure.
| Kit type | Speed | Precision | Best for |
|---|---|---|---|
| Drop-count | 3-5 minutes | High, single-unit resolution | Setting a filter or machine parameter |
| Test strips | 30-60 seconds | Banded, wider tolerance | Routine checks and quick screening |
Using Espresso Machine Water Hardness Test Strips
Espresso machine water hardness test strips work by dipping the pad into your sample for the time stated on the pack, shaking off the excess, then waiting for the colour to develop. Most strips need around 30 seconds.

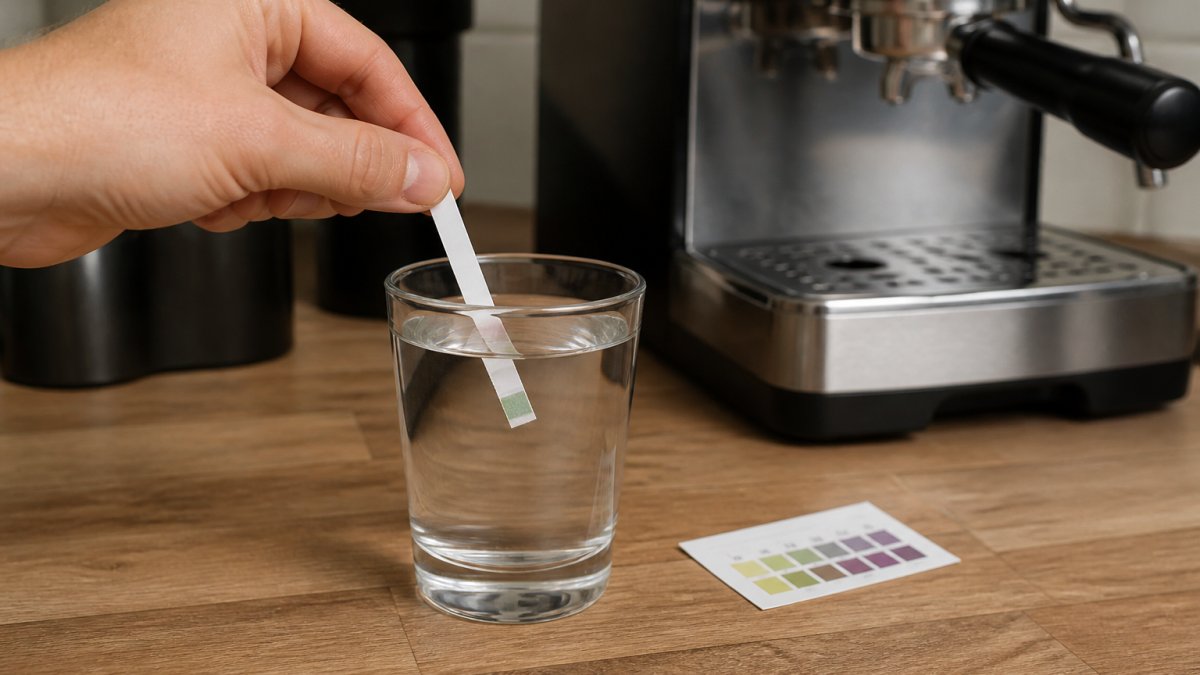
A few habits make strip results far more reliable:
- Keep the pack sealed. Damp strips give false readings.
- Read at the stated time, not later. Colours keep developing.
- Hold the pad flat and compare against the closest band, not the exact shade.
- Note the result and the date. A log beats memory.
Our Peak Water Test Strips come as a bundle of five kits, two strips in each, and are single use. They are the same strips supplied with the Peak Starter Pack, and they colour-match to the bypass settings in the Peak Water user guide.

Reading Your Results: Units, Thresholds and What They Mean
Hardness is reported in several units, and confusing them is a common source of error. The most precise unit is milligrams per litre (mg/L) of calcium carbonate (CaCO₃), which is numerically identical to parts per million (ppm). Other units include grains per gallon (gpg), degrees of hardness (dH), and French degrees (°f).
A conversion chart is handy for quick reference:
| ppm (mg/L as CaCO₃) | gpg | dH | °f |
|---|---|---|---|
| 50 | 2.9 | 2.8 | 5 |
| 100 | 5.8 | 5.6 | 10 |
| 150 | 8.8 | 8.4 | 15 |
| 200 | 11.7 | 11.2 | 20 |
| 300 | 17.5 | 16.9 | 30 |
These conversions let you compare your test result with any machine manual or filter specification, regardless of the unit used.
Hardness bands give a practical starting point for action. While exact thresholds vary by machine and manufacturer, a common framework is:
- Soft: under 60 ppm (under ~3.5 gpg). Little scale risk; descale infrequently.
- Medium: 60-120 ppm (~3.5-7 gpg). Manageable with routine descaling.
- Hard: 120-180 ppm (~7-10.5 gpg). A filter is recommended.
- Very hard: above 180 ppm (above ~10.5 gpg). Filter and descale on a strict schedule.
These bands are not legal standards; always defer to your espresso machine's manual for the manufacturer's specified limits.
Hardness Versus Alkalinity and Total Dissolved Solids
Hardness measures calcium and magnesium. Alkalinity measures the water's capacity to neutralise acid, primarily from carbonates and bicarbonates. Total dissolved solids (TDS) counts all dissolved substances, including sodium and chloride. Each affects your espresso differently:
- Hardness drives limescale formation.
- Alkalinity buffers coffee acids, influencing flavour balance.
- TDS indicates overall mineral load but not composition.
A water hardness test kit tells you about scale risk, but it does not measure alkalinity or chloride. If your machine manual specifies limits for these, test them separately. For example, high chloride can corrode stainless steel boilers even when hardness is low.
Turning Results into a Treatment Decision
A test result is only useful if it leads to action. Use this simple decision tree:
- If hardness is below 60 ppm: No filter needed. Descale every 6-12 months or as prompted.
- If hardness is 60-120 ppm: Consider a filter if you want to extend descaling intervals. Otherwise, descale every 3-6 months.
- If hardness is 120-180 ppm: Install a suitable filter. Descale every 2-3 months.
- If hardness is above 180 ppm: Install a filter and descale monthly. Re-test filtered water to confirm reduction.
- If alkalinity or TDS is high but hardness is low: You may need a different treatment (e.g., reverse osmosis or specific ion exchange) to address corrosion or taste issues.
Always re-test after installing a filter or changing water sources. A filter that is working should show a lower hardness reading.
Setting the Espresso Machine Water Hardness Setting
The espresso machine water hardness setting tells the machine how often to prompt for descaling. It does not soften the water.
Set it from your test result, not from a guess. Consult your machine's manual for the exact menu path, since it varies by model.
Get this wrong in the hard direction and the machine nags you constantly.
Re-test after any change to your supply, your filter, or your plumbing.
Choosing an Espresso Machine Water Filter
Choose a filter by matching its rated capacity and reduction claims to your measured hardness and your monthly water volume.
Work out your volume first.
For a jug-based option, the Peak Water Starter Pack includes a jug, a filter, two test strips and a user guide.
Test the filtered water, not just the tap. A filter that is working shows a lower reading than your baseline.
Test Accuracy, Repeatability and Troubleshooting
Test accuracy depends on both the kit and your technique. Strips are convenient but have a wider tolerance (often ±1 band), while drop-count kits can achieve single-drop resolution. To get reliable results, follow these practices:
- Check expiry dates: Expired reagents can give false readings. Always use kits within their shelf life.
- Store correctly: Keep strips sealed and dry; moisture and heat degrade them. Store drop-count reagents as directed, away from sunlight.
- Use clean glassware: Residue from soap or minerals can skew results. Rinse with the sample water before testing.
- Control lighting: Read strips under natural daylight or a neutral white light. Warm or dim light alters colour perception.
- Time precisely: Read strips at the exact time stated (often 30 seconds). Late readings make water appear harder.
If two tests disagree, run these checks:
- Test a fresh sample from the same tap, at room temperature.
- Repeat with a new strip from a different sealed pack.
- Compare against a drop-count kit if precision matters.
- If results still vary, your kit may be compromised or your technique inconsistent.
Repeatability is the true test of reliability. Run the same sample three times. If you get three different bands, the problem is likely technique or kit quality, not your water.
When to Use a Drop-Count Kit or Laboratory Test
Strips are fine for routine checks, but some situations demand greater precision:
- Setting a machine's hardness parameter: Use a drop-count kit to get a single ppm value.
- Troubleshooting persistent scale: A laboratory test can measure individual minerals and alkalinity.
- Commercial or high-volume use: Regular laboratory testing ensures consistency and protects expensive equipment.
For most home users, a drop-count kit offers a good balance of cost and accuracy. If you notice inconsistent results or need to verify filter performance, consider a laboratory test through a local water testing service.
Ongoing Testing and Maintenance Schedule
Water hardness can change over time. Test your water:
- At least twice a year as a baseline.
- After installing or changing a filter to confirm effectiveness.
- After moving house or switching water sources.
- Seasonally if your supply blends surface and groundwater.
Record each result with the date. This log helps you spot trends and decide when to descale or replace filters. Connect your test results to your machine's descaling schedule: if hardness increases, shorten the interval between descales.
Conclusion
The hard part of water testing is not the test. It is acting on the result before scale has already done its damage. Test cold tap water, read the strip on time, set the machine prompt to match, and re-test whenever your supply or filter changes.
Coffee Craft Studio supplies the pieces that make this straightforward. Our Peak Water Starter Pack - Transparent Charcoal pairs an adjustable filter jug with test strips and a user guide, so you can test, set and brew from one box. The Peak Water Test Strips keep your routine checks stocked at £1.00 a bundle.

Test your water this week. Your boiler will thank you in three years.
Frequently Asked Questions
How often should you test water hardness for an espresso machine?
Test when the machine is new, then retest every three to six months. Frequency should rise if your supplier blends water from different sources, if you move house, or if you notice limescale on the steam wand or in the drip tray. After fitting a new filter cartridge, test again within a week to confirm the cartridge is working as expected. Keep a simple written log of each reading with the date, so you can spot a gradual rise before it becomes a descaling job.
Can filtered water still be hard?
Yes. A standard carbon filter reduces chlorine and organic compounds but leaves calcium and magnesium largely untouched, so hardness passes straight through. Only ion-exchange resin or a reverse-osmosis stage removes hardness minerals. That is why testing after filtration matters: it tells you whether your espresso machine water filter is actually doing the job you bought it for. If the reading barely moves after a cartridge change, the filter is the wrong type for your water rather than faulty.
What should you do if your water is too hard for an espresso machine?
Confirm the reading with a second strip, then act on it. Options include fitting an ion-exchange filter, switching to a jug filter with adjustable settings, or using bottled water with a known low mineral content. Whichever route you take, retest afterwards. Also check your machine's warranty terms, because many manufacturers require proof of correct water treatment and may refuse a limescale-related claim where hardness limits have been ignored. Descaling alone treats the symptom, not the cause.
Will hard water damage an espresso machine?
It will, given time. Calcium and magnesium precipitate out as limescale when water is heated, coating the boiler, the group head and the thermoblock. That reduces flow, distorts temperature stability and forces the pump to work harder. Left alone, scale can block a steam valve or crack a boiler. Regular testing plus a suitable filter keeps scale formation slow enough that routine descaling handles the rest, which is far cheaper than replacing a boiler.