

Benefits of a Precision Coffee Scale for Espresso
Table of Contents
- Why Weighing Coffee Improves Espresso Consistency
- How to Use a Coffee Scale for Espresso
- Espresso Dose and Yield Ratio Explained
- Coffee Scale Accuracy for Espresso: What Actually Matters
- Weighing Espresso Shots: Dialling In and Diagnosing Problems
- Precision Limits and Measurement Errors to Watch For
- Which Scale Features Suit an Espresso Machine?
- Frequently Asked Questions
Last Updated: October 21, 2026
Why Weighing Coffee Improves Espresso Consistency
A precision coffee scale is the single cheapest upgrade that makes espresso repeatable.

Here is the core problem. A scoop of ground coffee varies in weight depending on how fine the grind is, how settled the beans are, and how full the scoop sits.
Weighing fixes that in three ways:
- Same dose every time. You start each shot from an identical weight of ground coffee.
- Same yield every time. You stop the shot at a target weight in the cup, not a guessed time.
- Same feedback every time. You can compare one shot against the next and know what changed.
Consistency is not about chasing perfection. It is about removing variables so the only thing you adjust is the grind. That is what a scale gives you.
How to Use a Coffee Scale for Espresso
Using a scale for espresso means weighing the dose before grinding, taring the cup, and stopping the shot at a target yield. The whole routine adds perhaps ten seconds to your workflow.
You need three numbers per shot: dose in, yield out, and time. A scale with a built-in timer gives you all three without juggling a phone stopwatch.
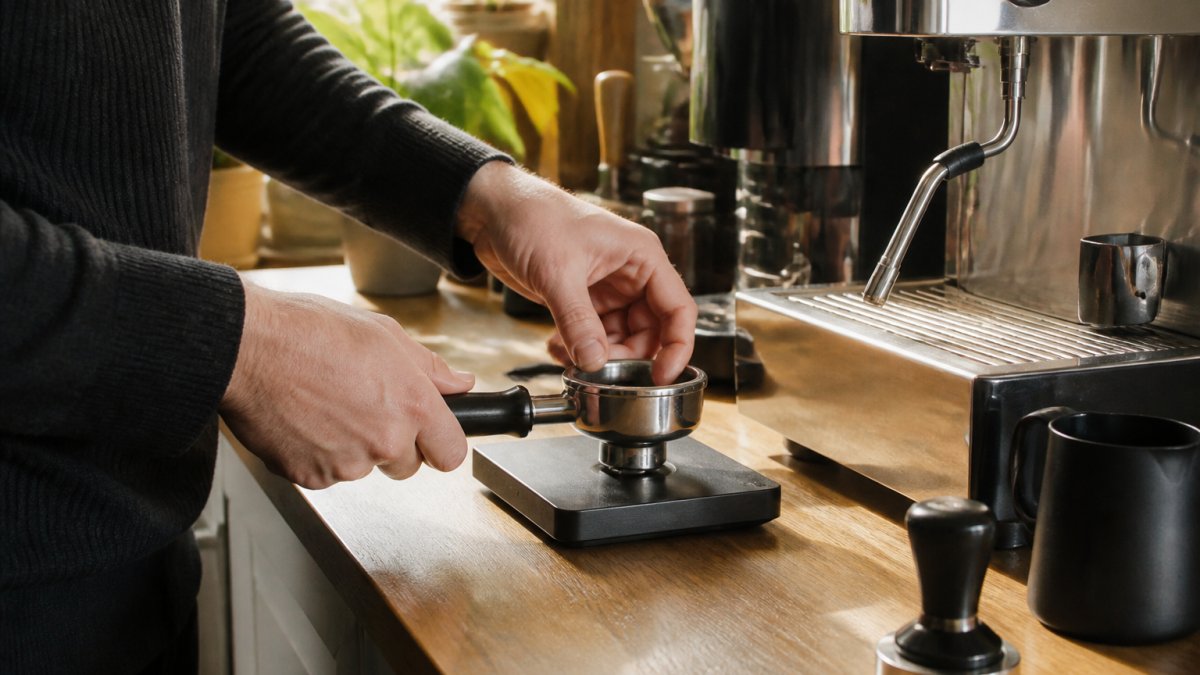
Step-by-Step: Dosing, Taring and Timing
- Check the scale fits before you start. Place the scale on the drip tray with your cup on top and the portafilter locked in. If the scale or cup fouls the group head or the drip tray lip, you will not get a stable reading. A compact scale with a low profile is the practical answer here.
- Weigh the beans, not the ground coffee. Put your portafilter or a small cup on the scale, tare to zero, and weigh whole beans to your target dose. This removes one variable and lets you adjust the dose without wasting a full basket.
- Grind straight into the basket until the readout hits your target dose, then stop. If you weighed beans first, grind the whole weighed portion.
- Tamp as normal. The scale has done its job for the dose.
- Put your cup on the scale and tare again. The scale now reads zero with the cup in place. Do this before the cup gets hot, a hot cup placed on the platform can shift the sensor reading.
- Start the shot and the timer together. Some scales start timing automatically when liquid hits the cup; if yours does, you can skip pressing start and let the first drops trigger it.
- Watch the weight climb and stop the pump at your target yield. Aim to stop a gram or two early if your scale's display lags, because espresso keeps flowing for a moment after the pump stops.
- Note dose, yield and time before you taste. These three numbers are your record for the next shot.
Where the Scale Sits in the Workflow
The scale earns its place at two points: dosing and pulling the shot. Everything between, distribution, tamping, locking in the portafilter, happens off the scale. Trying to weigh during distribution or tamping only adds vibration and drift.
A common pattern is to keep the scale on the drip tray for the whole session rather than moving it on and off. Moving it means re-taring and re-checking zero, and each move is a chance to knock the reading out.
Espresso Dose and Yield Ratio Explained
The espresso dose and yield ratio is the weight of dry coffee going in compared with the weight of liquid espresso coming out. A 1:2 ratio means an 18g dose produces a 36g yield.
Ratios give you a language for recipes. A shorter ratio, closer to 1:1.5, tends to push a denser, more syrupy shot. A longer ratio, around 1:2.5, pulls more from the puck and can taste thinner but brighter. Neither is right or wrong.
Worked Examples: From 18g Dose to 36g Yield
- 18g in, 36g out is a classic 1:2 ratio. A sensible starting point for most beans.
- 18g in, 27g out is 1:1.5. Try it when a shot tastes thin or sour at 1:2.
- 20g in, 40g out is also 1:2, scaled up for a larger basket.
- 16g in, 40g out is 1:2.5. Useful for lighter roasts that need more extraction.
Work in round numbers and change one thing at a time. If you move the dose, recalculate the yield to keep the ratio the same.
Coffee Scale Accuracy for Espresso: What Actually Matters
Coffee scale accuracy for espresso comes down to resolution and response speed, not a long feature list.

Resolution is the smallest change a scale can display. A 0.1g scale tells you the difference between 35.8g and 36.1g.
Response speed matters just as much. Espresso flows quickly at the end of a shot, and a slow display means you stop late. Look for a scale that settles its reading almost instantly.
Weighing Espresso Shots: Dialling In and Diagnosing Problems
Weighing espresso shots turns dialling in from a guessing game into a short, repeatable process. You taste, you check the numbers, and you change one variable. Most problems show up as a mismatch between dose, yield and time, and the scale is what makes that mismatch visible.
Here is how we would read a shot that tastes wrong:
Mini Espresso Scale with Timer, 0.1g Precision →
| Symptom | Likely Cause | What to Change |
|---|---|---|
| Sour, thin, fast shot | Under-extracted | Grind finer |
| Bitter, dry, slow shot | Over-extracted | Grind coarser |
| Right time, wrong taste | Ratio off | Adjust yield, keep grind |
| Inconsistent shot to shot | Uneven dose | Weigh every dose |
Dial in in this order: fix the dose, fix the ratio, then adjust the grind. Changing two things at once tells you nothing.
Worked Example: Changing Yield at a Fixed Dose
Suppose you are pulling 18g in and 36g out in 28 seconds, and the shot tastes thin and sour. Before touching the grind, try a shorter yield: stop at 30g instead of 36g.
If the shot instead tastes bitter and dry at 18g in and 36g out, try a longer yield, 40g or 42g, to pull more from the puck.
The point is that yield is a dial you can turn without changing the grind.
Reading Dose, Yield and Time Together
A shot that runs in 20 seconds at 18g in and 36g out is fast. A shot that runs in 40 seconds at the same numbers is slow. Time is only meaningful once dose and yield are fixed, which is why the scale comes first and the stopwatch second.
- Fast and sour: grind finer, keep dose and yield the same.
- Slow and bitter: grind coarser, keep dose and yield the same.
- Right time, wrong taste: adjust yield in small steps, then re-taste.
- Different every morning: weigh every dose and tare before each shot; inconsistency usually starts at the dose, not the grind.
When a Scale May Be Unnecessary
A scale is not mandatory for every setup. If you drink milk-based drinks where the espresso is one component among several, or you use a pressurised basket and pre-ground coffee, the gains from 0.1g precision are smaller.
The trade-off is real: a scale adds a step, needs charging or batteries, and takes up drip-tray space. For a busy household pulling several shots back to back, the friction can outweigh the benefit.
Precision Limits and Measurement Errors to Watch For
Every scale has limits, and knowing them stops you chasing problems that are not there. A 0.1g scale is precise, but it is not perfect. Small errors creep in from a few predictable places.
- Vibration. A machine pump or a wobbling cup can unsettle the reading.
- Heat. Placing a hot cup straight onto the platform can shift the sensor.
- Drift. Cheap scales lose zero over time; tare again before each shot.
- Overload. Stay well inside the capacity so the reading stays honest.
Calibration is the other piece. A scale that ships with a calibration weight lets you check it now and then. If it drifts, you recalibrate rather than compensate in your head.
Which Scale Features Suit an Espresso Machine?
The right scale for an espresso machine is compact enough to sit on the drip tray, fast enough to catch the end of a shot, and simple enough to use every morning. Size is the feature most people overlook. A scale that does not fit under the group head is no use, however accurate it is.
Features worth having:
- 0.1g resolution for dose and yield.
- Built-in timer so dose, yield and time come from one device.
- Auto-tare and auto-timer to keep your hands free.
- A compact footprint that clears the drip tray.
- Water resistance for the mess that espresso makes.
Our own range covers these needs at different levels. The Mini Espresso Scale with Timer at £40.29 gives 0.1g precision, a built-in timer and a compact body that fits most drip trays. The Wilfa Uni Mini Coffee Scale at £50.00 adds dedicated espresso and grinding modes that tare and time automatically. For busier setups, the Felicita Arc Waterproof Coffee Scale at £170.00 is water-resistant with auto-tare and auto-timer, and the larger Felicita Parallel Coffee Scale at £120.00 handles two cups or a portafilter with room to spare.

Frequently Asked Questions
Do you need a scale to make good espresso?
You can pull drinkable espresso without one, but you cannot repeat a good shot reliably. A precision coffee scale lets you fix the coffee dose and the espresso yield in grams, so the only variables left to change are grind and shot time. Without weighing, a scoop and a visual estimate of the pour give you a different dose and yield every time, which makes dialling in guesswork. For anyone chasing consistency rather than one lucky shot, a scale is the cheapest upgrade available.
What accuracy should a coffee scale have for espresso?
Look for 0.1g increments, which is the practical standard for espresso. A 0.1g resolution lets you hold a dose steady at, say, 18.0g and stop a shot at 36.0g, so changes you make to grind or time are the only things moving. Scales that read in 1g steps are fine for weighing beans but too coarse for coffee scale accuracy for espresso, where a single gram can shift the taste noticeably. Also check the scale settles quickly and does not drift while the pump runs.
Why weigh coffee beans before making espresso?
Weighing beans before grinding fixes the coffee dose, which is the input everything else depends on. If your basket holds 18g and you dose 16g one morning and 19g the next, the same grind setting and shot time will produce different results. Weighing the beans first, then grinding, also avoids leaving grounds in the grinder and makes retention less of a factor. It is the first step in any repeatable brew recipe and the foundation of weighing espresso shots.
Should you weigh espresso shots as well as the dose?
Yes, and the yield matters as much as the dose. Stopping a shot by eye or by colour gives you a different weight in the cup each time, even with an identical dose. Weighing the espresso shot in the cup, with the scale tared to zero, lets you stop at a target yield such as 36g and log the shot time alongside it. That pairing of dose, yield and time is what makes a shot repeatable and makes extraction problems diagnosable.
A scale only helps if it fits your machine and your routine. If you are weighing doses by eye and hoping for the best, the fix is smaller and cheaper than you think. At Coffee Craft Studio, we stock scales built for precision and performance, from the compact Mini Espresso Scale with Timer to the water-resistant Felicita Arc. Each one is chosen to help you hold dose, yield and time steady, shot after shot. Choose options that suit your setup and start pulling repeatable espresso.